
Placing a Sauna at Home: Your Complete Guide to Wellness
Building a home sauna sounds like a luxury reserved for spas or high-end retreats but the reality is more accessible than most people assume. Over one million home saunas are installed in North America alone and the numbers keep climbing. Yet the real surprise is that it’s not fancy equipment or square footage that makes the difference—it’s the attention to preparation and tiny details that decides whether your sauna transforms your wellness routine or turns into a short-lived headache.
Table of Contents
- Step 1: Assess Your Space For Sauna Placement
- Step 2: Choose The Right Sauna Type For Your Needs
- Step 3: Prepare The Installation Area Thoroughly
- Step 4: Set Up Electrical And Ventilation Requirements
- Step 5: Assemble And Install The Sauna System
- Step 6: Test For Quality And Safety Assurance
Quick Summary
| Key Point | Explanation |
|---|---|
| 1. Assess Space Thoroughly | Evaluate available indoor or outdoor areas for sauna installation, including clearance, moisture management, and structural integrity. |
| 2. Select Appropriate Sauna Type | Choose between traditional Finnish or infrared saunas based on your wellness goals and spatial limitations to optimize your experience. |
| 3. Ensure Moisture Management | Install moisture barriers and high-quality insulation to protect surrounding surfaces from humidity and heat generated by the sauna. |
| 4. Professional Electrical Setup Required | Engage a licensed electrician for proper installation of dedicated circuits to ensure safety and compliance with power needs. |
| 5. Conduct Comprehensive Testing | After installation, verify electrical connections, temperature distribution, and moisture levels to ensure safe and effective sauna performance. |
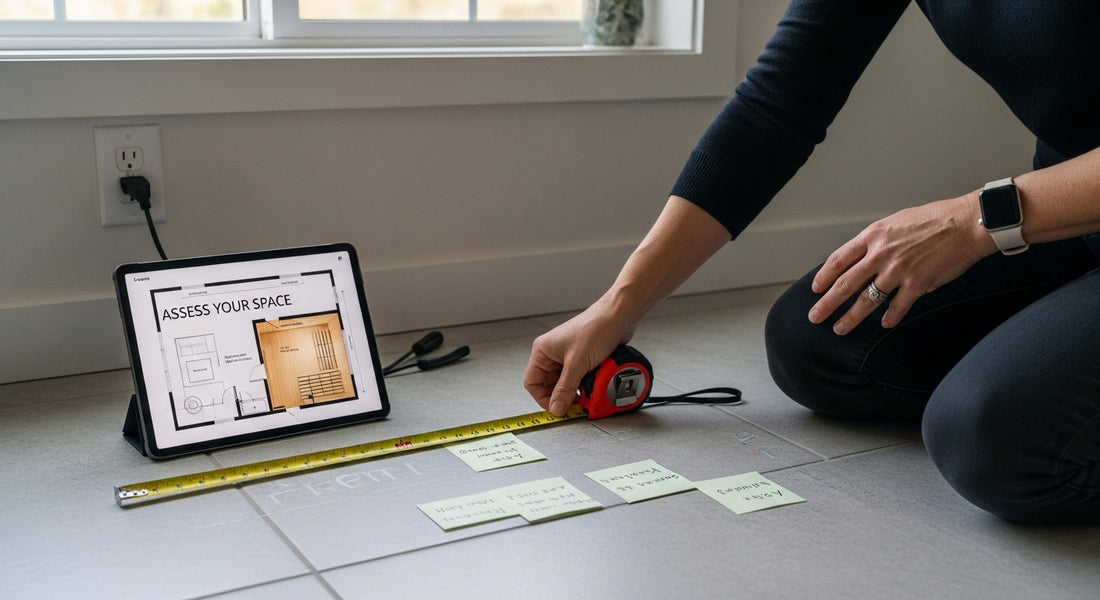
Step 1: Assess Your Space for Sauna Placement
Placing a sauna at home begins with a critical first step: thoroughly assessing your available space. Your home’s interior or exterior layout will determine the feasibility and ultimate success of your sauna installation. Before purchasing or constructing your sauna, you’ll need to conduct a comprehensive spatial evaluation that considers multiple factors beyond simple square footage.
Start by identifying potential locations that can accommodate your sauna’s specific requirements. Indoor spaces like basements, spare rooms, or dedicated wellness areas are excellent candidates. If you’re considering an outdoor installation, examine your backyard, patio, or deck for suitable positioning. Key considerations include proximity to electrical connections, moisture resistance, and structural integrity of the chosen area.
According to the North American Sauna Society, proper pre-construction planning is essential. Measure your intended space meticulously, accounting for not just the sauna’s footprint but also necessary clearance around all sides. Most home saunas require at least 6 inches of clearance from walls, and electrical units need additional space for ventilation and safety.
Consider the environmental conditions of your chosen location. Indoor saunas demand robust moisture management and proper ventilation to prevent potential structural damage. Rooms with tile or sealed concrete flooring work best, as they can withstand high humidity levels. For outdoor installations, select areas protected from direct wind and with stable ground conditions.
Electrical requirements are another crucial assessment element. Home saunas typically need dedicated 220240 volt electrical circuits, which might necessitate professional electrical work. Consult an electrician to verify your space can safely support the sauna’s power needs without overloading existing circuits.
Finally, evaluate potential thermal and moisture impacts on surrounding surfaces. Ensure walls can be adequately insulated, and consider installing moisture barriers or special wall treatments to protect your home’s structural integrity. By methodically assessing your space through these comprehensive criteria, you’ll set the foundation for a successful home sauna installation that integrates seamlessly with your living environment.
![]()
Step 2: Choose the Right Sauna Type for Your Needs
Selecting the appropriate sauna type is a pivotal decision that will significantly impact your wellness experience and home installation. Each sauna variant offers unique characteristics, designed to meet different health goals, spatial constraints, and personal preferences. Understanding these nuanced differences will empower you to make an informed choice that aligns perfectly with your wellness objectives.
Traditional Finnish saunas represent the classic sauna experience, characterized by high temperatures and low humidity. These saunas typically operate between 170 and 200 degrees Fahrenheit, creating an intense heat environment that promotes profound sweating and cardiovascular stimulation. Wood-burning and electric models provide authentic thermal experiences, with wood-burning options offering a more traditional atmosphere but requiring more complex installation.
According to Mayo Clinic Proceedings, infrared saunas offer a distinctly different therapeutic approach. Unlike traditional saunas, infrared models operate at lower ambient temperatures while directly heating body tissues through electromagnetic waves. These saunas typically range between 110 and 140 degrees Fahrenheit, making them more accessible for individuals sensitive to extreme heat. Infrared technology penetrates deeper into muscle tissues, potentially providing enhanced muscle recovery and metabolic benefits.
Consider your personal health objectives when evaluating sauna types. If cardiovascular conditioning and intense heat tolerance are your primary goals, traditional Finnish saunas might be ideal. For those seeking gentler, more targeted muscle recovery or with limited heat tolerance, infrared models present an excellent alternative. Portable infrared options also provide greater flexibility for smaller living spaces or renters who want a temporary wellness solution.
Budget and installation complexity are additional critical factors. Traditional saunas often require more substantial upfront investments and complex electrical or ventilation configurations. Infrared models generally offer more compact, straightforward installations with lower initial and operational costs. Some modern infrared units can be plugged directly into standard electrical outlets, simplifying the setup process.
Ultimately, your sauna selection should harmonize with your spatial constraints, health goals, and personal comfort preferences.
Below is a comparison table to help you quickly differentiate between Traditional Finnish saunas and Infrared saunas based on installation, heat, and user preferences.
| Sauna Type | Operating Temperature | Humidity Level | Installation Complexity | Best Suited For |
|---|---|---|---|---|
| Traditional Finnish | 170-200°F | Low | Higher – requires specialized electrical setup and ventilation; may need wood-burning stove or electric heater | Users wanting intense heat and cardiovascular stimulation |
| Infrared | 110-140°F | Very Low | Lower – can be plugged into standard outlets; portable models available | Users sensitive to heat, muscle recovery, or limited space |
| By carefully evaluating these multifaceted considerations, you’ll transform your home sauna from a mere wellness accessory into a personalized therapeutic sanctuary. |
Step 3: Prepare the Installation Area Thoroughly
Preparing your installation area is a meticulous process that demands careful attention to detail and strategic planning. This critical step transforms your selected space from a mere room into a safe, functional, and optimized wellness environment for your new sauna. Success here determines not just the sauna’s performance, but also its long-term durability and your overall enjoyment.
Moisture management becomes your primary initial concern. Unlike other home installations, saunas generate significant humidity and heat, which can potentially damage surrounding surfaces if not properly protected. Begin by installing robust moisture barriers on walls and floors. Cement board or specialized waterproof membranes work exceptionally well, creating a protective shield against potential water damage and condensation buildup.
According to the North American Sauna Society, proper insulation is fundamental to creating an efficient sauna environment. Invest in high-quality thermal insulation with a minimum rating of R12 for walls and R16 for ceilings. Reflective foil insulation works remarkably well, helping to retain heat and improve overall energy efficiency. Pay special attention to electrical conduits and any penetrations in walls, sealing them completely to prevent heat loss and potential moisture intrusion.
Ventilation represents another crucial aspect of preparation. Your sauna requires strategic airflow to maintain a comfortable and safe environment. Install two vents positioned at different heights to facilitate natural air circulation. The lower vent allows fresh air entry, while the upper vent enables hot air and moisture to escape. This design prevents stagnant air and helps regulate internal temperature and humidity levels.
Electrical preparation demands professional precision. Consult a licensed electrician to install a dedicated circuit capable of handling your sauna’s specific power requirements. Most home saunas need a 220240 volt circuit with appropriate amperage. Ensure all electrical components are rated for high-humidity environments and installed according to local building codes.
Finally, create a comprehensive protection strategy for surrounding surfaces. Choose flooring materials that can withstand high temperatures and moisture, such as sealed concrete, large format tiles, or specialized vinyl designed for wet environments. Consider installing a discrete floor drain to manage potential water runoff, enhancing both functionality and cleanliness. By methodically addressing these preparation elements, you’ll create a robust foundation for a safe, efficient, and enjoyable home sauna experience.
Step 4: Set Up Electrical and Ventilation Requirements
Establishing proper electrical and ventilation systems represents a critical phase in your home sauna installation that directly impacts safety, performance, and user experience. This step transforms your carefully prepared space into a functional wellness environment by ensuring optimal power supply and air circulation.
Electrical requirements demand professional precision and careful planning. Most home saunas require a dedicated 220240 volt circuit with specific amperage ratings matching your chosen sauna model. This isn’t a standard DIY project many homeowners can tackle alone. Hire a licensed electrician experienced in high-humidity, high-temperature installations to guarantee safe and code-compliant electrical setup. They will install a specialized circuit breaker, moisture-resistant conduits, and properly grounded electrical connections that can withstand the sauna’s intense thermal environment.
According to InterNACHI, ventilation is equally crucial for maintaining a safe and comfortable sauna experience. Proper air circulation prevents moisture buildup, regulates temperature, and ensures a healthier environment. Your ventilation strategy should incorporate two primary vents positioned at different heights. The lower vent, typically placed near the floor, allows cool fresh air to enter, while the upper vent near the ceiling enables hot, humid air to escape. This natural convection process helps maintain air quality and prevents potential mold or mildew growth.
Consider the specific requirements of your sauna type when designing the ventilation system. Infrared saunas might have different airflow needs compared to traditional Finnish-style saunas. Some modern sauna models come with integrated ventilation systems, but custom installations often require more thoughtful planning. Aim for a minimum airflow rate that allows complete air replacement every 510 minutes, which helps maintain optimal humidity and temperature levels.
Electrical outlets and control panels deserve special attention. Position them strategically to provide convenient access while maintaining a safe distance from direct heat sources. Waterproof and heat-resistant outlet covers are essential. Many experienced sauna installers recommend installing a dedicated control panel outside the sauna that allows users to adjust temperature and settings without entering the heated space.
Final verification involves a comprehensive system check. Test all electrical connections, confirm proper grounding, and verify that ventilation vents open and close smoothly. A professional inspection can provide additional peace of mind, ensuring your sauna’s electrical and ventilation systems are perfectly configured for safe, enjoyable use.
Step 5: Assemble and Install the Sauna System
Assembling and installing your sauna system represents the pivotal moment where your wellness vision transforms from concept to reality. This intricate process demands precision, patience, and methodical attention to detail to ensure a safe, functional, and enjoyable home sauna experience.
Begin by carefully unpacking all sauna components and organizing them systematically. Layout every panel, bench, heater, and accessory in a clean, well-lit area with ample workspace. Review the manufacturer’s installation manual thoroughly, noting specific assembly instructions unique to your sauna model. Some prefabricated saunas offer modular designs that simplify installation, while traditional custom builds require more complex framing and construction techniques.
According to the North American Sauna Society, proper insulation forms the foundation of an effective sauna installation. Install fiberglass insulation with a high-quality aluminum foil vapor barrier, ensuring complete coverage of walls and ceiling. Pay exceptional attention to potential thermal bridging points where heat might escape. Seal all insulation edges meticulously, creating a continuous thermal envelope that maximizes heat retention and energy efficiency.
Heater installation demands particular care and precision. Position the heater according to manufacturer specifications, typically allowing sufficient clearance from walls and combustible materials. Electric heaters require specific mounting techniques, while wood-burning stoves need additional considerations like heat shielding and proper ventilation. Secure all electrical connections with waterproof, heat-resistant components, and ensure the heater is level and stable.
Wood paneling represents the aesthetic and functional interior of your sauna. Select high-quality, moisture-resistant wood like cedar or hemlock, known for their durability and pleasant aromatics. Install panels with slight gaps to allow natural wood expansion and contraction. Smooth all interior surfaces to prevent potential splinters, and apply a heat-resistant wood sealant that preserves the material’s natural beauty while protecting against moisture damage.
Bench installation requires strategic planning for optimal comfort and heat distribution. Position benches at varying heights to accommodate different user preferences, ensuring stable mounting and smooth surfaces. The lower bench typically receives less intense heat, while the upper bench provides a more intense sauna experience. Leave sufficient space between bench levels for comfortable seating and air circulation.
Final verification involves a comprehensive system check. Test all electrical connections, confirm heater functionality, and verify that ventilation systems operate smoothly. Run a preliminary heating cycle to identify any potential issues and ensure all components function harmoniously. Your meticulously assembled sauna is now ready to deliver transformative wellness experiences right in the comfort of your home.

Step 6: Test for Quality and Safety Assurance
Testing your newly installed sauna system represents the critical final phase that transforms your carefully constructed wellness space from a potential risk into a reliable, safe haven for relaxation and health optimization. This comprehensive verification process ensures every component functions precisely as intended, safeguarding both your investment and your personal well-being.
Electrical system testing demands meticulous attention and precision. Begin with a professional electrical inspection to verify all connections, grounding, and circuit integrity. Use a high-quality multimeter to check voltage stability and confirm that the electrical load matches manufacturer specifications. Look for any signs of loose connections, unexpected resistance, or potential heat anomalies that could indicate underlying electrical issues.
Temperature and heat distribution represent another crucial testing parameter. Run multiple heating cycles, carefully monitoring how evenly heat disperses throughout the sauna. Use an infrared thermometer to create a detailed heat map, identifying any cold spots or unexpected temperature variations. Pay special attention to wall surfaces, bench areas, and regions near the heater. Consistent heat distribution ensures optimal sauna performance and prevents potential thermal stress on materials.
Moisture management testing helps prevent long-term structural damage. Conduct humidity tests during and after sauna sessions, tracking condensation levels and evaluating how effectively your ventilation system manages moisture. Watch for any signs of water accumulation, potential wood warping, or unexpected dampness on surrounding surfaces. A properly designed sauna should maintain controlled humidity levels without creating excessive moisture buildup.
Safety feature verification involves systematically checking every protective element. Test emergency shut-off mechanisms, temperature limiters, and ventilation controls. Ensure door handles operate smoothly, and verify that all seals and insulation components remain intact under heat stress. Simulate potential usage scenarios to confirm that the sauna responds predictably and safely under various operational conditions.
Final user experience testing provides the ultimate validation. Invite a trusted friend or family member to experience the sauna, gathering subjective feedback about comfort, heat quality, and overall functionality. Pay attention to their observations about temperature consistency, bench comfort, and general usability. This real-world testing often reveals nuanced insights that technical measurements might miss.
Document all test results meticulously, creating a comprehensive record of your sauna’s performance baseline. This documentation serves not just as a personal reference but can be valuable for future maintenance and potential warranty claims. By executing this thorough testing process, you transform your sauna from a mere installation into a reliable, safe wellness sanctuary.
Below is a step overview table summarizing the main steps to place a sauna at home, with core tasks and outcomes for each phase.
| Step | Main Task | Key Outcome |
|---|---|---|
| 1. Assess Space | Evaluate indoor or outdoor areas for clearance, moisture, and integrity | Confirm feasible location for sauna installation |
| 2. Choose Sauna Type | Decide between traditional or infrared based on needs and fit | Select best sauna for your space and goals |
| 3. Prepare Installation Area | Install moisture barriers, insulation, and ventilation | Ready and protected space to install sauna safely |
| 4. Set Up Electrical & Ventilation | Hire electrician, configure dedicated circuits and vents | Safe, code-compliant power and airflow for sauna |
| 5. Assemble & Install | Build sauna structure, connect heater, install benches | Fully assembled, functional sauna in place |
| 6. Test for Quality & Safety | Inspect, test electrical and ventilation, verify comfort | Confirm safe, effective, and enjoyable operation |
Transform Your Home Into a Wellness Retreat with Best Life Sauna
Are you ready to overcome the challenge of finding the right sauna for your unique space and turn your wellness dreams into reality? You have learned how essential it is to assess your home, select a sauna type, and prepare your installation area. Now, you deserve solutions that take the guesswork out of the process and deliver the quality your health and comfort demand. At Best Life Sauna, you can explore a curated selection of premium infrared, traditional, and outdoor saunas, each designed to make the steps outlined in your guide effortless and rewarding. Our user-friendly site is here to help you solve common pain points such as space limitations, installation uncertainty, and product selection worries.

Let us help you make your wellness sanctuary a reality—quickly and confidently! Take the next step with Best Life Sauna and browse a complete range of saunas and transformative wellness solutions. Make your choice today to enjoy offers like free shipping and a price match guarantee. Start your wellness journey now and feel the difference every day in your own home.
Frequently Asked Questions
What factors should I consider when choosing a location for my home sauna?
When choosing a location for your sauna, consider proximity to electrical connections, moisture resistance, structural integrity, and adequate clearance around the sauna. Also, assess environmental conditions such as ventilation and flooring durability.
What are the key differences between traditional Finnish saunas and infrared saunas?
Traditional Finnish saunas operate at higher temperatures (170-200°F) and have lower humidity, promoting intense sweating. In contrast, infrared saunas operate at lower temperatures (110-140°F) and use electromagnetic waves to directly heat the body, making them preferable for individuals sensitive to extreme heat.
How do I ensure proper ventilation for my sauna?
Proper ventilation involves installing two vents at different heights: a lower vent for fresh air intake and an upper vent for hot, humid air escape. This design promotes natural air circulation and helps maintain optimal temperature and humidity levels.
What steps should I take to prepare the installation area for my sauna?
Prepare the installation area by installing moisture barriers on walls and floors, ensuring proper insulation, and setting up ventilation systems. Also, consult a licensed electrician to handle the required electrical preparations safely.