
Ultimate Guide to Outdoor Sauna Setup for Relaxation
Building an outdoor sauna sounds like a luxury project for the pros, but it is more accessible than most people realize. Privacy, level ground, and smart placement matter far more than just having a fancy backyard. In fact, placing your sauna where natural windbreaks and partial shade are present has a bigger impact on comfort than most high-end upgrades ever could.

Table of Contents
- Step 1: Determine Your Ideal Location
- Step 2: Choose The Right Sauna Type
- Step 3: Prepare The Ground And Foundation
- Step 4: Assemble The Sauna Structure
- Step 5: Install Electrical And Heating Elements
- Step 6: Verify Functionality And Enjoy
Quick Summary
| Key Point | Explanation |
|---|---|
| 1. Choose a private and sheltered location | Select a spot that offers privacy and protection from wind to enhance your sauna experience and enjoyment. |
| 2. Ensure a stable, level foundation | A completely solid base is crucial to support your sauna’s weight and maintain its structural integrity over time. |
| 3. Select the right sauna type for you | Decide between traditional or infrared options based on your relaxation needs and maintenance preferences. |
| 4. Hire professionals for electrical installation | Engage licensed electricians to ensure the safe setup of electrical connections and heating elements for your sauna. |
| 5. Test functionality before use | Conduct thorough checks of heating, electrical systems, and temperature controls to confirm everything operates safely and efficiently. |
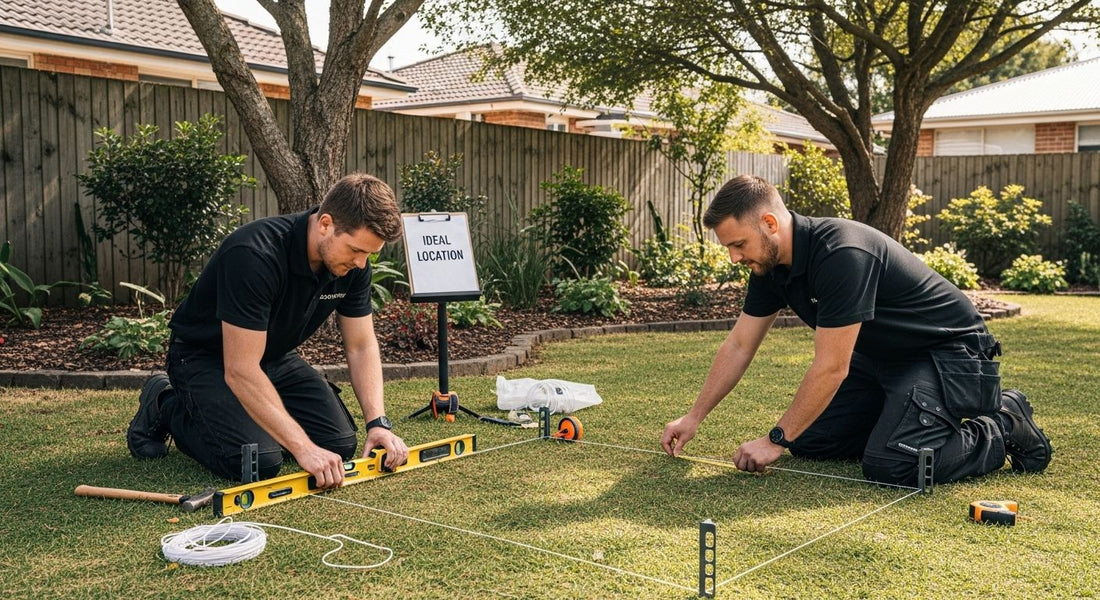
Step 1: Determine Your Ideal Location
Selecting the perfect location for your outdoor sauna is a critical first step in creating a relaxing and functional wellness space. Your outdoor sauna setup requires careful consideration of several key factors that will impact both its performance and your overall enjoyment.
Begin by surveying your outdoor space with a critical eye. The ideal location should offer privacy, protection from wind, and a comfortable approach to your sauna. Look for areas that provide natural windbreaks like fences, garden walls, or strategic landscaping. Proximity to your home is important consider placing the sauna close enough for convenient access but far enough to create a sense of separation and retreat.
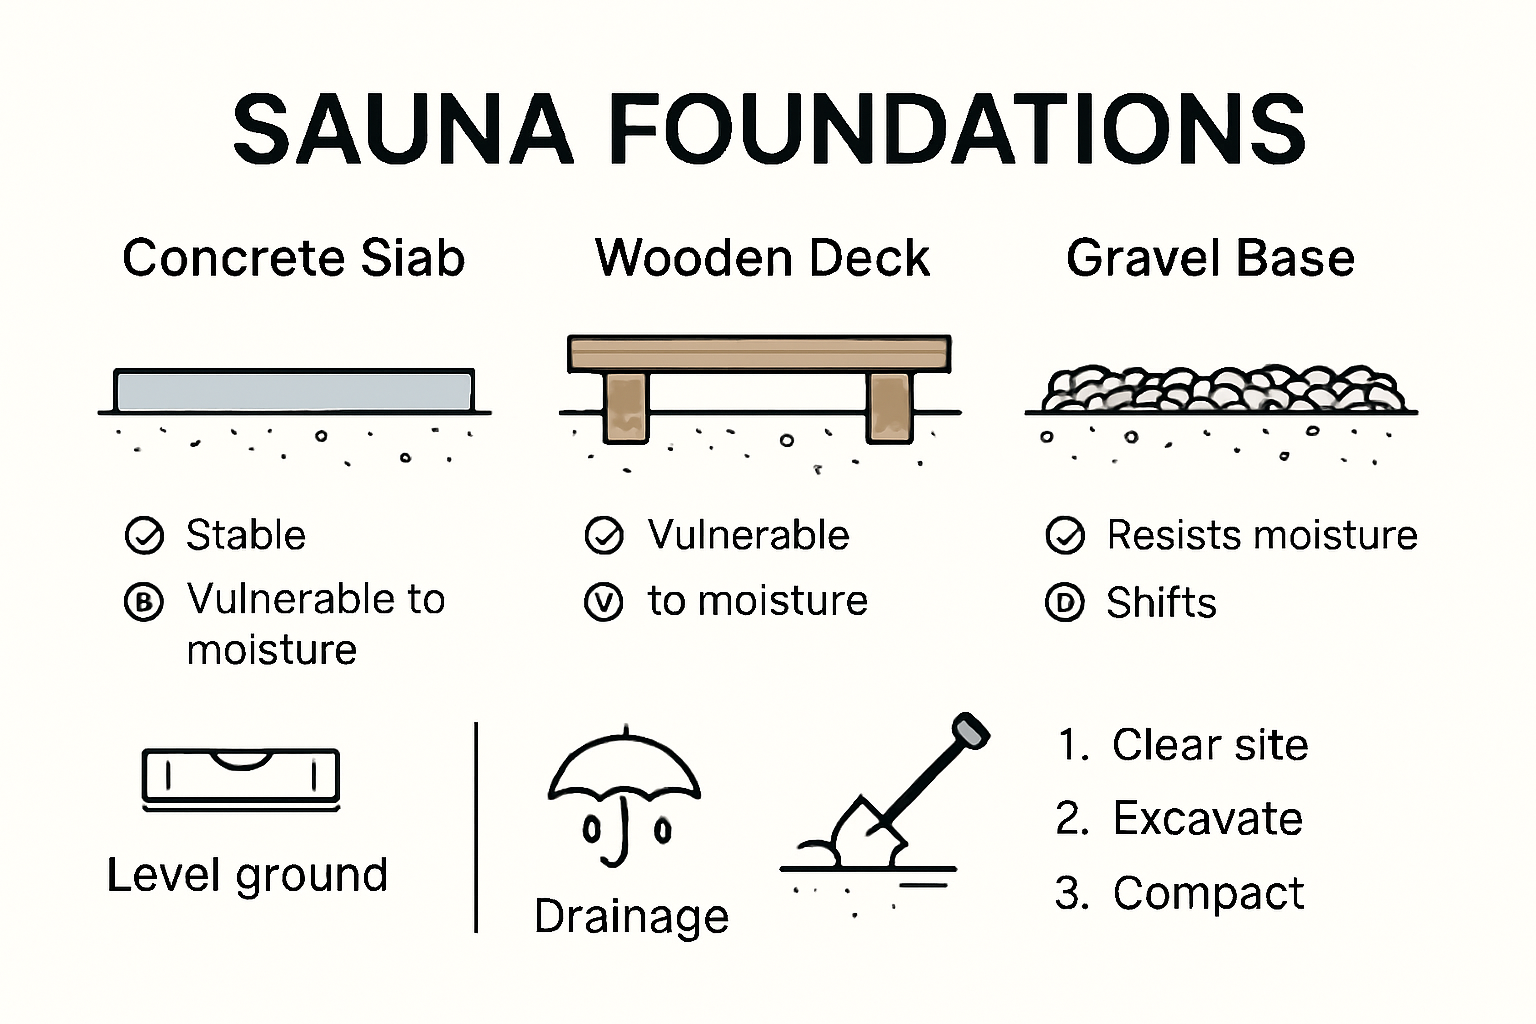
Surface stability is paramount for your outdoor sauna setup. You will need a completely level ground that can support the substantial weight of the sauna structure. According to North American Sauna Society, concrete slabs, sturdy wooden decks, or professionally prepared gravel platforms work best. Avoid areas with potential water pooling or ground that shifts seasonally, as these can compromise your sauna’s foundation and structural integrity.
Consider your local climate and sun exposure carefully. While some direct sunlight can be pleasant, excessive exposure might cause wood warping or uncomfortable temperatures during summer months. Partial shade from trees or strategic positioning can help regulate the external environment of your sauna. Morning sun exposure can be particularly enjoyable, warming the space gently without intense midday heat.
Utility access is another crucial consideration. Your outdoor sauna will likely require electrical connections for heating elements, so proximity to power sources will simplify installation. Additionally, think about creating a convenient path between your sauna and entry points like backdoors or changing areas. A well-planned route can enhance the overall experience, making transitions smooth and comfortable.
Verify your location meets these key criteria:
- Stable, level ground surface
- Minimal wind exposure
- Convenient access from your home
- Adequate electrical connections
- Some natural shade or protection
By methodically evaluating these elements, you will establish a strong foundation for an exceptional outdoor sauna experience that promises years of relaxation and wellness.
Step 2: Choose the Right Sauna Type
Selecting the appropriate sauna type is a pivotal decision that will define your outdoor relaxation experience. Each sauna variety offers unique characteristics that can dramatically impact your wellness journey and overall enjoyment.
Traditional wood-fired saunas represent the most authentic sauna experience, connecting you with centuries-old Nordic wellness traditions. These saunas generate heat through wood-burning stoves, creating a classic, intense warmth that penetrates deeply into muscles and promotes profound relaxation. The rich, smoky aroma and intense heat create an immersive experience that many wellness enthusiasts cherish. However, they require more maintenance and consistent wood supply, which might challenge those seeking a low-maintenance option.
Infrared saunas offer a modern alternative that operates differently from traditional models. Instead of heating the air, these innovative systems use electromagnetic waves to directly warm your body. According to Mayo Clinic, infrared saunas operate at lower temperatures while providing deeper tissue penetration. This makes them particularly appealing for individuals who find traditional high-heat saunas uncomfortable. Electric infrared models are typically easier to install and maintain, making them an excellent choice for those prioritizing convenience and consistent performance.
When evaluating sauna types, consider your personal wellness goals, physical tolerance for heat, and practical installation constraints. Traditional saunas excel in providing intense, enveloping heat and a more ritualistic experience. Infrared saunas offer precise temperature control and potentially more targeted health benefits like improved circulation and muscle recovery. Some outdoor sauna enthusiasts even opt for hybrid models that combine elements of both approaches.
Your selection criteria should include:
- Heat generation method
- Temperature range
- Installation complexity
- Maintenance requirements
- Personal health and relaxation objectives
Ultimately, the right sauna type is a deeply personal choice that balances technical specifications with your individual wellness vision. Take time to explore different options, understanding that your perfect outdoor sauna setup reflects your unique relaxation needs and lifestyle preferences.
To help you compare the main types of outdoor saunas discussed above, here’s a table summarizing the key differences between traditional and infrared saunas.
| Sauna Type | Heat Generation Method | Typical Temperature Range | Maintenance Needs | Installation Complexity | Key Benefits |
|---|---|---|---|---|---|
| Traditional (Wood-Fired) | Wood-burning stove | 150-195°F | Higher (wood supply, ash removal) | More involved | Intense heat, classic ambiance |
| Infrared | Electromagnetic panels | 110-130°F | Lower (occasional wipe-down) | Easier | Precise temp, deep penetration |
| Hybrid | Combination (wood stove & panels) | 110-195°F | Medium | Most complex | Flexible use, hybrid experience |
Step 3: Prepare the Ground and Foundation
Preparing a solid foundation for your outdoor sauna is more than just leveling ground it is about creating a stable, durable platform that will support your wellness sanctuary for years to come. The right foundation ensures structural integrity, prevents moisture damage, and provides a professional finish to your outdoor sauna setup.
Begin by thoroughly clearing and assessing your chosen location. Remove all vegetation, rocks, and debris from the area, creating a clean slate for your foundation. Use a professional grade landscape rake to smooth the surface, ensuring you have a clear workspace. Professional landscapers recommend creating a space that extends at least 2 feet beyond your sauna’s planned footprint, giving you room for precise positioning and future maintenance.
Concrete slabs offer the most robust foundation option for outdoor saunas. Carefully measure and mark your area, then create a wooden form using sturdy 2x4 lumber. Compact the ground inside the form using a plate compactor, which ensures a dense, stable base that prevents future settling. When pouring concrete, use a reinforced mix with wire mesh or rebar to increase structural strength. Allow the concrete to cure completely typically 5 to 7 days before placing your sauna structure, protecting it from potential moisture and temperature variations.
Alternatively, a professionally constructed wooden platform can provide an excellent foundation. Use pressure treated lumber rated for outdoor use, creating a raised platform that allows air circulation underneath and protects against ground moisture. According to U.S. Access Board, ensure your platform meets structural requirements for stability and safety. Space wooden joists 16 inches apart, using galvanized joist hangers and exterior grade screws to create a rock solid base.
Verify your foundation meets these critical standards:
- Completely level surface
- Minimum 2 inch drainage gap underneath
- No visible ground vegetation or organic material
- Solid, compact base without soft spots
- Proper water drainage away from the foundation
Take your time with this foundational step. A meticulously prepared ground will transform your outdoor sauna from a simple structure into a reliable wellness retreat that stands strong against environmental challenges.
Step 4: Assemble the Sauna Structure
Assembling your outdoor sauna structure requires precision, patience, and a systematic approach. This critical phase transforms your carefully prepared foundation into a functional wellness sanctuary that will provide years of relaxation and health benefits.
Begin by carefully unpacking all components and organizing them systematically. Lay out each piece of lumber, wall panel, and structural element in the order you will need them. Inventory all hardware screws, bolts, and connectors to ensure nothing is missing. Professional builders recommend creating a clean, organized workspace with all tools within reach before starting assembly. Use a reliable level, power drill, measuring tape, and protective work gloves to ensure accurate and safe construction.
Frame construction demands meticulous attention to detail. Start with the floor frame, ensuring it sits perfectly level on your prepared foundation. Attach floor joists using galvanized exterior screws, creating a robust base that will support the entire structure. Pay close attention to joint connections, verifying each connection is square and tightly secured. Wall panels should be attached methodically, beginning with the base and working upward. Use a helper if possible to hold panels steady while you secure them, maintaining consistent alignment and preventing potential warping.
Wood selection plays a crucial role in your sauna’s longevity. Choose kiln dried lumber specifically rated for high humidity environments. Cedar and hemlock are excellent choices due to their natural resistance to moisture and temperature variations. When joining panels, leave slight gaps between wood pieces to allow for natural expansion and contraction. This prevents potential cracking or structural stress during temperature changes.
Verify your structure meets these critical assembly standards:
- All walls are perfectly vertical
- Floor frame is completely level
- No gaps larger than 1/4 inch between panels
- All connections are tight and secure
- Structure sits squarely on foundation

Take your time during assembly. A carefully constructed sauna not only looks professional but will provide a safe, reliable wellness retreat that withstands outdoor elements and delivers consistent performance for years to come.
Step 5: Install Electrical and Heating Elements
Electrical installation represents the most critical and potentially complex phase of your outdoor sauna setup. Precise electrical work ensures safe, reliable operation and transforms your structure from a wooden shell into a functional wellness retreat.
Professional electrical installation is strongly recommended for outdoor saunas. While confident DIY enthusiasts might tackle some aspects, the unique environmental challenges of an outdoor installation demand specialized knowledge. Begin by confirming your electrical panel has sufficient amperage to support the sauna heater. Most outdoor sauna heaters require a dedicated 220V circuit with 30 to 50 amp service. Consult a licensed electrician to verify your existing electrical infrastructure can safely accommodate the new load.
Run underground conduit from your main electrical panel to the sauna location, using heavy duty weatherproof electrical cable rated for exterior use. Protect all electrical connections with waterproof junction boxes and use marine grade gaskets to prevent moisture intrusion. Install a ground fault circuit interrupter (GFCI) breaker specifically designed for outdoor electrical systems. This critical safety feature immediately cuts power if any electrical irregularities are detected, protecting users from potential shock hazards.
Heating element placement requires strategic consideration. For traditional saunas, position the electric heater or wood burning stove centrally, ensuring even heat distribution. Infrared saunas demand precise positioning of electromagnetic panels to maximize therapeutic coverage. According to International Electrotechnical Commission, electrical heating appliances must meet specific safety standards to ensure reliable performance and user protection.
Verify your electrical installation meets these critical standards:
- Dedicated circuit with appropriate amperage
- Weatherproof electrical connections
- Properly installed GFCI protection
- Secure underground conduit
- No exposed wiring
- Compliance with local building codes
Take your time and prioritize safety. A meticulously installed electrical system ensures your outdoor sauna delivers consistent, reliable performance while protecting you and your investment from potential electrical hazards.
Step 6: Verify Functionality and Enjoy
Congratulations on completing your outdoor sauna setup. The final step transforms your carefully constructed wellness sanctuary from a project into a personal retreat where relaxation and health converge. Methodical verification ensures your sauna delivers the exceptional experience you have worked hard to create.
Initial testing requires a systematic approach. Begin by performing a comprehensive electrical system check. Turn on the power and monitor the heating elements, verifying they reach and maintain appropriate temperatures. Most saunas require a warm up period of 30 to 45 minutes before first use. During this time, carefully observe electrical connections, listen for any unusual sounds, and check that temperature controls function smoothly. Do not enter the sauna during this initial test phase.
Temperature and humidity management are crucial for a safe, enjoyable sauna experience. Use a reliable digital thermometer and hygrometer to confirm your sauna reaches and maintains optimal conditions. Traditional saunas typically operate between 150 to 195 degrees Fahrenheit with 10 to 20 percent humidity. Infrared models function at lower temperatures around 110 to 130 degrees. According to CDC guidelines, proper monitoring helps prevent potential heat related health risks.
Your first personal sauna session should be approached gradually. Start with shorter 10 to 15 minute sessions, staying hydrated and listening to your body. Bring a towel to sit on, wear minimal clothing, and keep water nearby. Pay attention to how your body responds to the heat. Some initial light headedness is normal, but exit immediately if you feel uncomfortable or experience any concerning symptoms.
Verify these critical elements before regular use:
- Heating elements function correctly
- Temperature controls are accurate
- Electrical connections remain secure
- Ventilation works properly
- No unusual odors or sounds during operation
Remember that your outdoor sauna is more than a structure it is a personal wellness sanctuary. Take time to appreciate the journey of creating this space and the health benefits it will provide.
Review this checklist table to verify your sauna installation meets all essential criteria before regular use. This helps ensure safety, longevity, and optimal experience.
| Verification Item | What to Check | Outcome if Successful |
|---|---|---|
| Heating elements | Reach appropriate temperature; heat evenly | Consistent, safe heating |
| Temperature controls | Adjust and maintain temperatures smoothly | Accurate temperature settings |
| Electrical connections | No exposed wiring; all connections secure | Safe and reliable power |
| Ventilation | Air flow adequate; no blocked vents | Comfortable air quality |
| Foundation and structure | Level, stable, all joints secure | Sauna is sturdy and durable |
| Odors or unusual sounds | No burning/plastic smells or odd noises during operation | Confirms safe installation |
| Drainage and ground conditions | No pooling water; gap for moisture runoff | Prevents long-term damage |
Ready to Transform Your Wellness Space?
You have invested the time to understand every step of the perfect outdoor sauna setup. But sourcing the ideal sauna, matching it to your unique foundation, and ensuring the right accessories can still feel overwhelming. At Best Life Sauna, we understand the real challenges enthusiasts face when turning their wellness goals into reality. Whether you are drawn to traditional wood-fired warmth, precision-controlled infrared technology, or need outdoor-rated accessories, our curated selection helps you build a sanctuary that endures and delights. Discover solutions that prevent common mistakes like unstable installations or mismatched heaters, and move toward the comfort you deserve.
Craving expert guidance or wanting to browse premium products featured in this guide? Now is the best time to elevate your backyard experience. Explore our exclusive outdoor sauna options and find top-rated infrared models and accessories, all with a price match guarantee and free shipping on orders over $200. Start your journey at Best Life Sauna today for confident results and lasting relaxation.
Frequently Asked Questions
What is the best location for an outdoor sauna?
The ideal location for your outdoor sauna should offer privacy, protection from wind, and convenient access to your home. Look for areas with stable, level ground and natural windbreaks like fences or landscaping. Ensure there is adequate sun exposure without excessive heating from direct sunlight.
What types of saunas are available for outdoor use?
There are two main types of outdoor saunas: traditional wood-fired saunas and infrared saunas. Traditional saunas provide intense heat through wood-burning stoves, while infrared saunas use electromagnetic waves to heat your body directly at lower temperatures. Each type offers different experiences and benefits, so consider your wellness goals when choosing.
How do I prepare the ground for an outdoor sauna?
To prepare the ground, start by clearing the area of vegetation, rocks, and debris. Ensure the ground is level and compacted. For a foundation, concrete slabs are ideal, but a sturdy wooden platform can also work if built with pressure-treated lumber that allows for moisture drainage.
What are the key electrical requirements for an outdoor sauna?
Outdoor saunas typically require a dedicated 220V circuit with a service of 30 to 50 amps. It’s crucial to use weatherproof electrical cables and install a ground fault circuit interrupter (GFCI) breaker to protect against electrical hazards. Consult a licensed electrician for any installation to ensure safety and compliance with local codes.