
Optimize Outdoor Sauna Ventilation for Ultimate Relaxation

Outdoor saunas offer the ultimate retreat, letting you relax in the open air while wrapped in soothing heat. Yet many owners are surprised to learn that ineffective ventilation can drop temperatures by as much as 20 degrees and leave moisture lingering, ruining the experience. Most people focus on décor or heaters, but smart sauna owners actually get the best results by upgrading airflow first.
Table of Contents
- Step 1: Assess Your Current Sauna Ventilation Setup
- Step 2: Determine Optimal Vent Placement
- Step 3: Select Appropriate Ventilation Materials
- Step 4: Install Vents For Efficient Airflow
- Step 5: Test Ventilation Effectiveness
- Step 6: Adjust And Maintain Ventilation System
Quick Summary
| Key Point | Explanation |
|---|---|
| 1. Assess current ventilation setup | Inspect air intake and exhaust points for blocks and wear to ensure proper air circulation. |
| 2. Determine optimal vent placement | Install one vent near the floor and another near the ceiling to promote effective airflow and heat distribution. |
| 3. Select durable ventilation materials | Use corrosion-resistant materials like aluminum or galvanized steel to withstand sauna conditions for longevity. |
| 4. Install vents carefully | Ensure precision during installation to achieve a seamless airflow system that enhances comfort and efficiency. |
| 5. Conduct thorough performance tests | Test airflow and temperature distribution regularly to validate effectiveness and make necessary adjustments for optimal relaxation. |
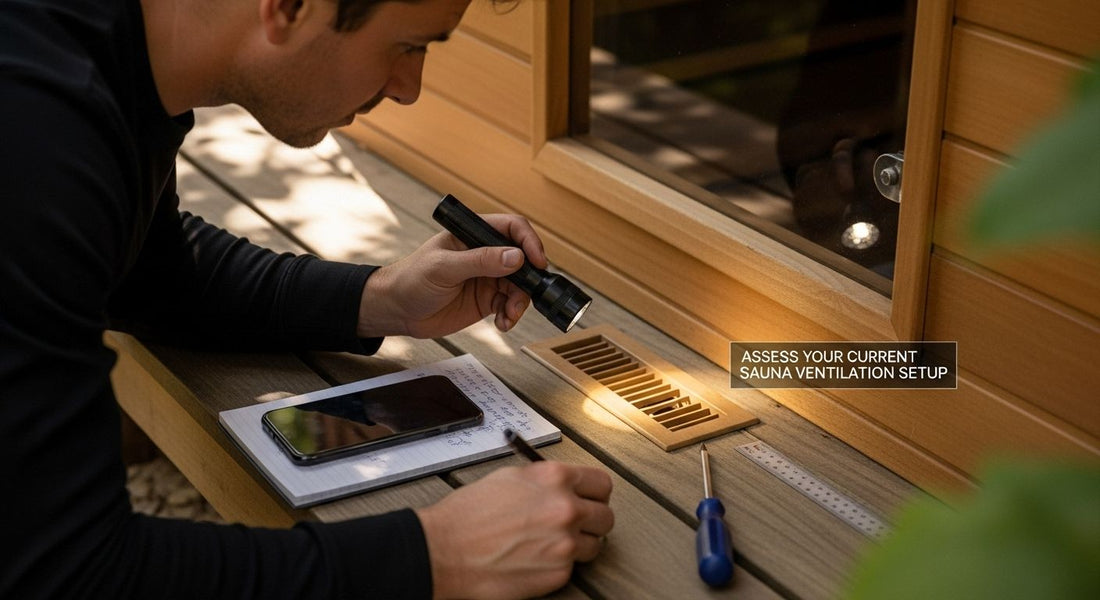
Step 1: Assess Your Current Sauna Ventilation Setup
Before diving into outdoor sauna ventilation improvements, understanding your current setup is crucial for creating a safe and comfortable relaxation environment. A thorough assessment helps identify potential airflow issues that could compromise your sauna experience.
Begin by physically inspecting your outdoor sauna’s existing ventilation system. Look carefully at air intake and exhaust points, checking for any obstructions, damage, or signs of wear that might impede proper air circulation. Pay special attention to vents located near the floor and ceiling, as these are critical for creating effective thermal circulation.
According to Evidence-Based Complementary and Alternative Medicine, proper air quality management is essential in sauna environments. You will want to examine how air currently moves through your space. Are there natural gaps or intentional vents? Do windows or doors provide additional airflow? Understanding these elements helps you recognize where improvements might be needed.
Document your findings systematically. Create a simple sketch or take photographs that highlight current ventilation points, noting their size, condition, and positioning. This visual record will serve as a valuable reference when planning upgrades or modifications. Key observation points should include:
- Location of existing vents
- Size and condition of air intake/exhaust openings
- Potential blockages or obstructions
- Materials surrounding ventilation points
Consider the unique characteristics of your outdoor sauna. Wooden structures, exposure to external elements, and specific design features can significantly impact ventilation effectiveness. Metal mesh screens, adjustable vents, or strategic placement of openings can dramatically improve air circulation.
To verify your assessment, perform a simple airflow test. On a calm day, open your sauna’s vents and observe how air moves. Use a lightweight piece of tissue or thin fabric near different ventilation points to see how air currents behave. Minimal or stagnant movement indicates that your current setup might require professional intervention or significant modifications.
Remember, the goal of this assessment is not just identifying problems but understanding your sauna’s unique ventilation dynamics. Each outdoor sauna has its own characteristics, and a personalized approach ensures optimal results in the upcoming ventilation optimization process.
Step 2: Determine Optimal Vent Placement
After completing your initial sauna ventilation assessment, the next critical step is strategically determining the most effective vent placement for maximum air circulation and comfort. Proper positioning transforms a basic sauna into an exceptional relaxation environment by ensuring consistent airflow and temperature regulation.
The fundamental principle of outdoor sauna ventilation involves creating a natural air exchange that promotes comfortable heat distribution. According to the Health & Fitness Association, optimal ventilation requires precise vent positioning that facilitates efficient air movement.
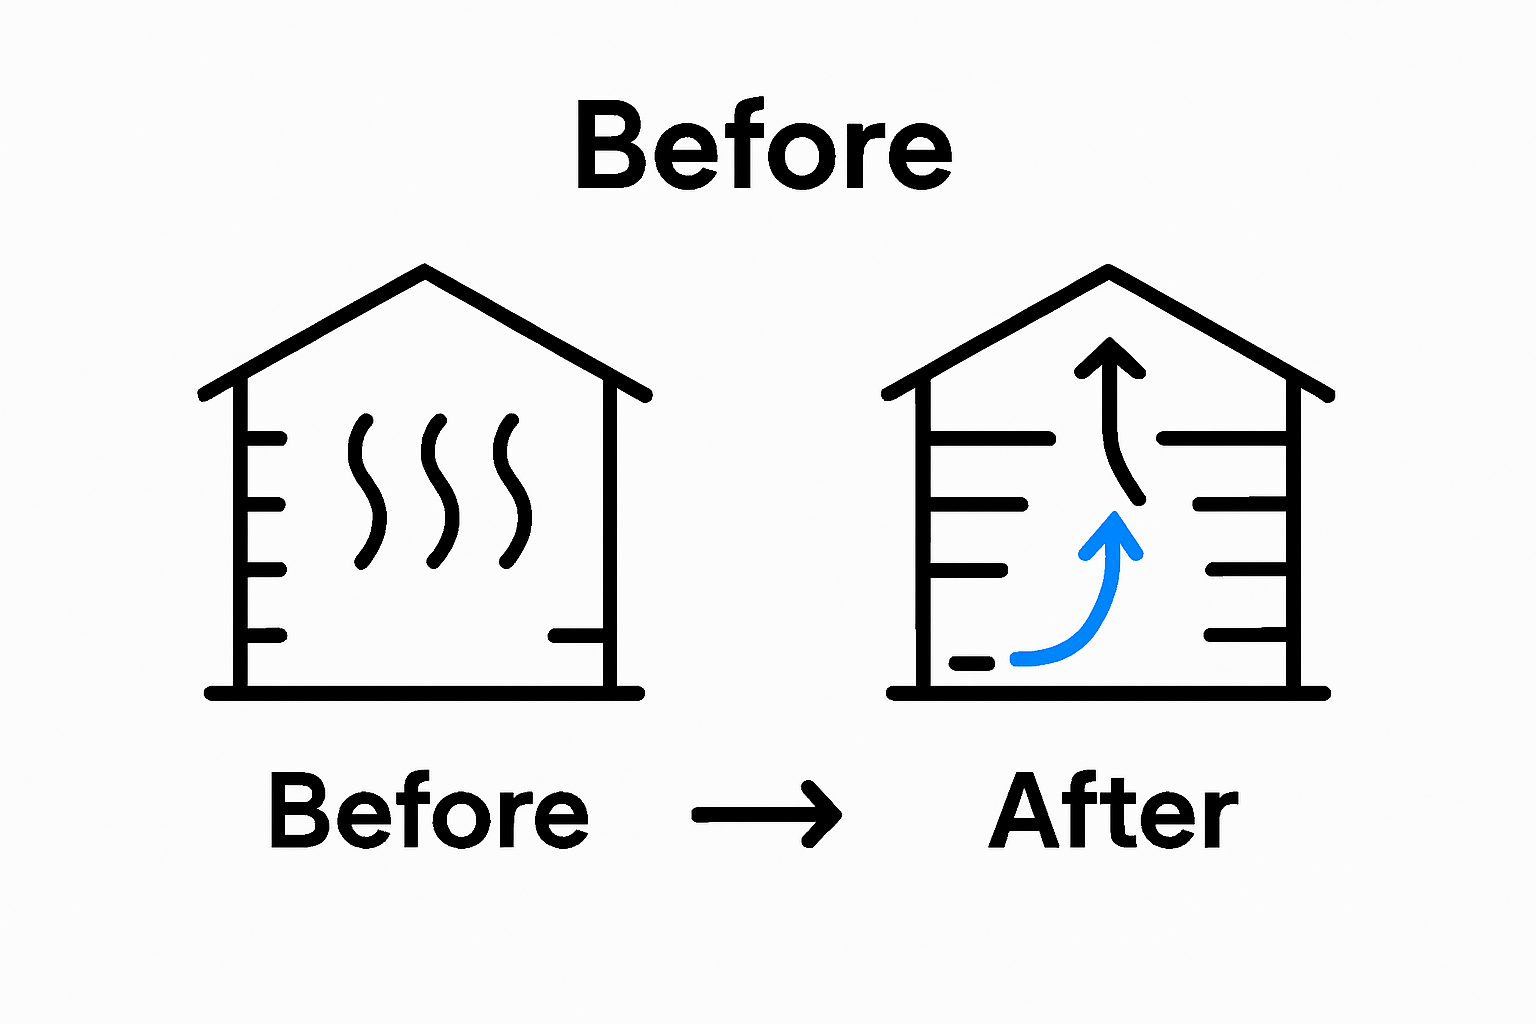
Strategic vent placement depends on several crucial factors. Consider your sauna’s specific dimensions, heater location, and overall structural design. The goal is to create a balanced airflow that prevents heat stagnation while maintaining a comfortable internal temperature. Typically, this means installing vents at different heights to encourage natural convection.
Most professionals recommend positioning one vent approximately 4 inches above the floor, ideally located near the heater. This lower vent allows cooler air to enter the sauna, creating a natural circulation pattern. The second vent should be placed near the ceiling on the opposite wall, enabling warm air to escape and preventing uncomfortable heat buildup.
Key considerations for optimal vent placement include:
- Proximity to the sauna heater
- Wall material and structural integrity
- Prevailing wind directions in your outdoor environment
- Potential external obstructions
Measure and mark potential vent locations carefully. Use a level to ensure precise alignment and consider the sauna’s overall thermal dynamics. Wood-burning saunas might require different ventilation strategies compared to electric models, so adjust your approach accordingly.
To verify your vent placement, conduct a simple smoke test. Light an incense stick or use a small smoke generator near your proposed vent locations. Observe how smoke moves through the space, which will reveal potential airflow patterns and help you fine-tune your ventilation strategy.
Remember that ventilation is not just about installing vents—it’s about creating a harmonious air exchange system that enhances your sauna experience. Take your time, be methodical, and don’t hesitate to make minor adjustments as you progress through the optimization process.
Step 3: Select Appropriate Ventilation Materials
Choosing the right ventilation materials is a critical step in creating an effective outdoor sauna air circulation system. Your material selection will directly impact the durability, performance, and overall longevity of your sauna’s ventilation setup.
According to the Finnish Technical Research Centre, specific materials are essential for withstanding the extreme temperature and humidity conditions typical in sauna environments. Corrosion resistance and heat tolerance become paramount considerations when selecting ventilation components.
Aluminum and galvanized steel emerge as top choices for vent construction. These materials offer exceptional durability and can withstand the intense heat and moisture cycles experienced in outdoor saunas. Stainless steel mesh screens provide an additional layer of protection, preventing insects and debris from entering while maintaining optimal airflow.
When selecting vent materials, consider the specific challenges of an outdoor environment. Your chosen materials must resist weathering, UV exposure, and temperature fluctuations. Powder-coated metals offer an extra layer of protection, preventing rust and maintaining aesthetic appeal over time.
Essential material considerations include:
- Thermal conductivity
- Corrosion resistance
- UV and weather durability
- Ease of installation
- Cost-effectiveness
Pay close attention to the thickness and quality of your chosen materials. Thinner gauges might be more affordable but can warp or degrade quickly under extreme conditions. Invest in high-quality materials that provide a balance between performance and longevity.
For wooden sauna structures, select materials that complement the existing construction. Brass or bronze fittings can provide an elegant touch while offering superior corrosion resistance. Avoid materials that might react negatively with wood treatments or create galvanic corrosion.
Verify your material selection by consulting with local sauna experts or conducting thorough research on material performance in similar outdoor environments. Request material samples when possible, and perform simple durability tests to ensure they meet your specific requirements.
Remember that material selection is more than a technical decision—it’s an investment in your sauna’s long-term performance and your overall relaxation experience. Take time to explore options, compare specifications, and choose materials that will provide reliable ventilation for years to come.
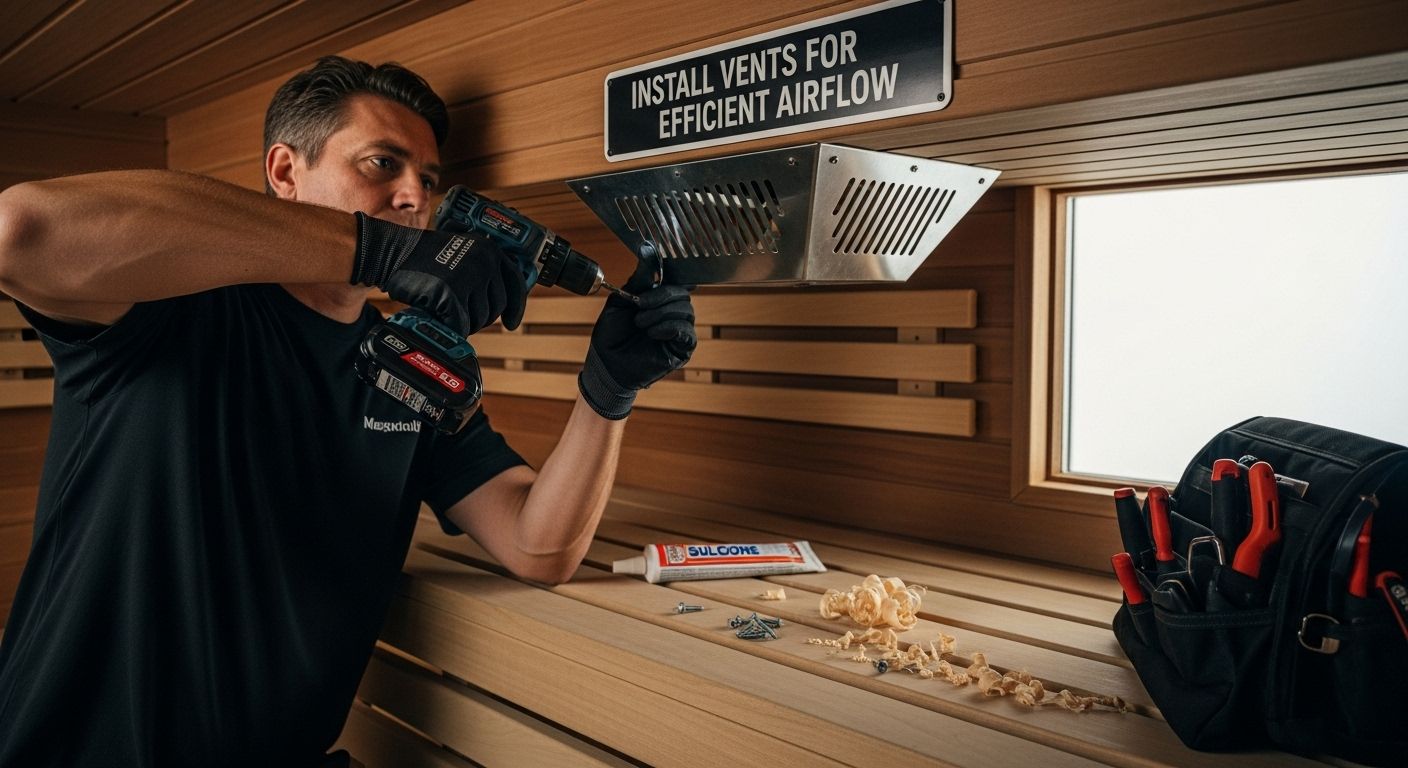
Step 4: Install Vents for Efficient Airflow
With your materials selected and locations determined, the next crucial phase is installing vents to create a seamless airflow system in your outdoor sauna. This step transforms your careful planning into a functional ventilation solution that enhances comfort and performance.
According to Journal of Visualization, strategic vent installation significantly impacts overall airflow efficiency. Precision is key during the installation process. Begin by carefully measuring and marking exact vent locations, ensuring they align perfectly with the positioning strategy developed in previous steps.
Gather your tools before starting the installation. You will need a power drill, appropriate drill bits, measuring tape, level, silicone sealant, and safety equipment like gloves and protective eyewear. Wooden sauna structures require different installation techniques compared to metal or composite materials, so adjust your approach accordingly.
The following table summarizes essential tools and materials for installing outdoor sauna ventilation, allowing you to plan and prepare for efficient, high-quality installation.
| Tool / Material | Purpose | Key Considerations |
|---|---|---|
| Power drill | Creating vent openings | Use appropriate drill bits for wood or metal |
| Measuring tape | Accurate marking of vent locations | Double-check measurements before cutting |
| Level | Ensures vents are aligned horizontally and vertically | Prevents airflow issues due to misalignment |
| Jigsaw or hole saw | Cutting precise vent holes | Select type based on sauna material |
| Silicone sealant | Seals vent edges for weatherproofing | Choose high-temperature, outdoor-rated sealant |
| Stainless steel screws | Attaching vents securely | Rust-resistant for outdoor use |
| Safety equipment (gloves, eyewear) | Protection during cutting and installation | Always wear during power tool use |
When cutting vent openings, use extreme caution. Measure twice, cut once remains the golden rule. Create clean, precise cuts that allow for a tight, secure fit. Use a high-quality jigsaw or hole saw designed for your specific material. For wooden structures, seal the cut edges with a protective wood sealant to prevent moisture damage and potential rot.
Critical installation considerations include:
- Maintaining precise horizontal and vertical alignment
- Ensuring a tight, weatherproof seal around vent edges
- Avoiding structural compromise during cutting
- Protecting surrounding materials from potential damage
Secure each vent using appropriate fasteners. Stainless steel screws work best for outdoor environments, providing robust attachment while resisting corrosion. Apply a generous bead of high-temperature silicone sealant around the vent’s perimeter to create a weatherproof barrier that prevents moisture infiltration.
To verify successful installation, conduct a comprehensive airflow test. Use a lightweight piece of tissue or smoke generator to observe air movement. Watch how air enters and circulates through the sauna, checking for smooth, consistent flow without unexpected turbulence or dead zones.
Remember that installation is more than a technical procedure—it’s about creating a harmonious system that supports your ultimate goal of relaxation. Take your time, work methodically, and don’t hesitate to make minor adjustments to achieve optimal performance.
Step 5: Test Ventilation Effectiveness
After meticulously installing your outdoor sauna vents, the critical final step is thoroughly testing the ventilation system to ensure optimal performance and comfort. This comprehensive evaluation will validate your hard work and guarantee a superior sauna experience.
According to the World Health Organization, effective ventilation testing requires multiple assessment techniques. Temperature and airflow monitoring become your primary diagnostic tools. Begin by conducting a series of systematic tests that examine how air moves through your newly installed ventilation system.
Start with a basic smoke test to visualize airflow patterns. Use an incense stick or small smoke generator near different vent locations. Watch carefully how smoke moves, noting any areas of stagnation or unexpected air current disruptions. The smoke should flow smoothly, indicating consistent and balanced ventilation throughout the sauna space.
Key performance indicators to evaluate include:
- Consistent temperature distribution
- Smooth air movement
- Absence of cold or hot spots
- Minimal condensation buildup
- Quick heat recovery after door opening
Perform multiple tests under different conditions. Run your sauna at various temperatures and observe how the ventilation system responds. Pay special attention to air circulation during initial heating, peak temperature periods, and cooling down phases. A well-designed system should maintain relatively uniform temperatures and prevent uncomfortable drafts.
Utilize a digital thermometer with multiple probes to measure temperature variations across different sauna areas. Place probes near the floor, midpoint, and ceiling to understand how heat and air distribute through the space. Ideal ventilation should show minimal temperature differences between these points.
Consider conducting a comfort test by spending time in the sauna and subjectively evaluating the air quality. Notice how quickly the space heats, how comfortable the airflow feels, and whether any areas feel stuffy or excessively drafty. Trust your sensory experience as a valuable assessment tool.
Remember that ventilation testing is an iterative process. Be prepared to make minor adjustments to vent positioning or size based on your findings. Patience and careful observation will help you fine-tune your outdoor sauna’s ventilation system to perfection.
Step 6: Adjust and Maintain Ventilation System
Transitioning from initial installation to long-term performance, the final step involves creating a comprehensive maintenance strategy that ensures your outdoor sauna’s ventilation system remains efficient and reliable. Ongoing care transforms a good ventilation setup into an exceptional one.
According to the Occupational Safety and Health Administration, establishing a systematic maintenance program is crucial for preserving ventilation effectiveness. Regular inspections become your primary defense against potential performance degradation. Develop a structured schedule that includes monthly visual assessments and comprehensive quarterly evaluations.
Begin by creating a detailed maintenance log. Document each inspection, noting any observations about airflow, potential obstructions, or material wear. This record will help you track system performance over time and identify emerging issues before they become significant problems.
Critical maintenance activities include:
- Cleaning vent surfaces and removing debris
- Checking for signs of rust or material deterioration
- Verifying seal integrity around vent openings
- Inspecting for potential insect or animal intrusions
- Examining surrounding wood for moisture damage
Seasonally adjust your maintenance approach. Outdoor saunas face unique challenges from changing weather conditions. During winter, check for potential ice or snow blockages. In summer, inspect for increased insect activity or potential wood expansion that might affect vent performance.
Pay special attention to the metal components of your ventilation system. Apply a light coat of high-temperature silicone spray to moving parts and hinges, preventing rust and ensuring smooth operation. For wooden structures, use a wood-safe protective sealant around vent edges to prevent moisture penetration and potential rot.
Consider conducting a comprehensive performance test twice annually. Repeat the airflow and smoke tests from earlier steps, comparing current results with your initial installation measurements. Any significant deviation might indicate the need for more extensive adjustments or component replacement.
Remember that maintenance is an ongoing relationship with your sauna. Treat your ventilation system as a living component that requires consistent care and attention. A proactive approach will ensure your outdoor sauna remains a sanctuary of relaxation and comfort for years to come.
Upgrade Your Outdoor Sauna Comfort With Best Life Sauna
If you are struggling with poor airflow, uneven heat, or persistent condensation in your outdoor sauna, you are not alone. The article above breaks down how crucial proper vent placement, material selection, and long-term maintenance are for creating a relaxing sauna environment. Many sauna owners face challenges like blocked vents, ineffective airflow, and uncomfortable temperature fluctuations. Without the right solutions, your outdoor retreat can quickly become stuffy and less enjoyable.
Ready to experience true relaxation without compromise? Discover how Best Life Sauna can help transform your wellness routine. Our extensive selection of outdoor saunas and innovative ventilation accessories are designed to address exactly the pain points covered in this guide. Enjoy free shipping on most orders and the confidence of our price match guarantee. Do not put up with mediocre sauna sessions any longer. Visit Best Life Sauna today to find the perfect products for optimal air quality and unbeatable comfort in your outdoor space.
Frequently Asked Questions
What is the importance of assessing my current sauna ventilation setup?
Assessing your current sauna ventilation setup helps identify any airflow issues that could affect your sauna experience. A thorough evaluation allows you to recognize areas needing improvement, ensuring a safe and comfortable environment for relaxation.
How can I determine the optimal placement for sauna vents?
Optimal vent placement involves positioning one vent near the floor (around 4 inches above) and another near the ceiling on the opposite wall. This encourages natural air circulation, allowing cooler air to enter and warm air to escape, preventing heat stagnation.
What materials are best suited for outdoor sauna ventilation?
Aluminum and galvanized steel are excellent choices for ventilation materials due to their corrosion resistance and heat tolerance. Consider also using stainless steel mesh screens to prevent debris and insects from entering while ensuring airflow remains optimal.
How can I effectively test my sauna’s ventilation system after installation?
To test your sauna’s ventilation system, conduct a smoke test using an incense stick to visualize airflow patterns. Monitor temperature distribution throughout the sauna to ensure even heating and check for any cold or hot spots while spending time in the sauna.