

Master Sauna Environment Creation for Ultimate Relaxation
Planning to install a home sauna sounds tempting but most people overlook just how much space and precision are really required. Surprisingly, not even the fanciest sauna will work right if you skip the basics. In fact, most residential saunas need at least 12 to 18 inches of open space on all sides and often a dedicated 220-240 volt circuit. Think you just plug it in and sweat? Think again. Skipping these details can turn your sanctuary into a headache instead of a retreat.
Table of Contents
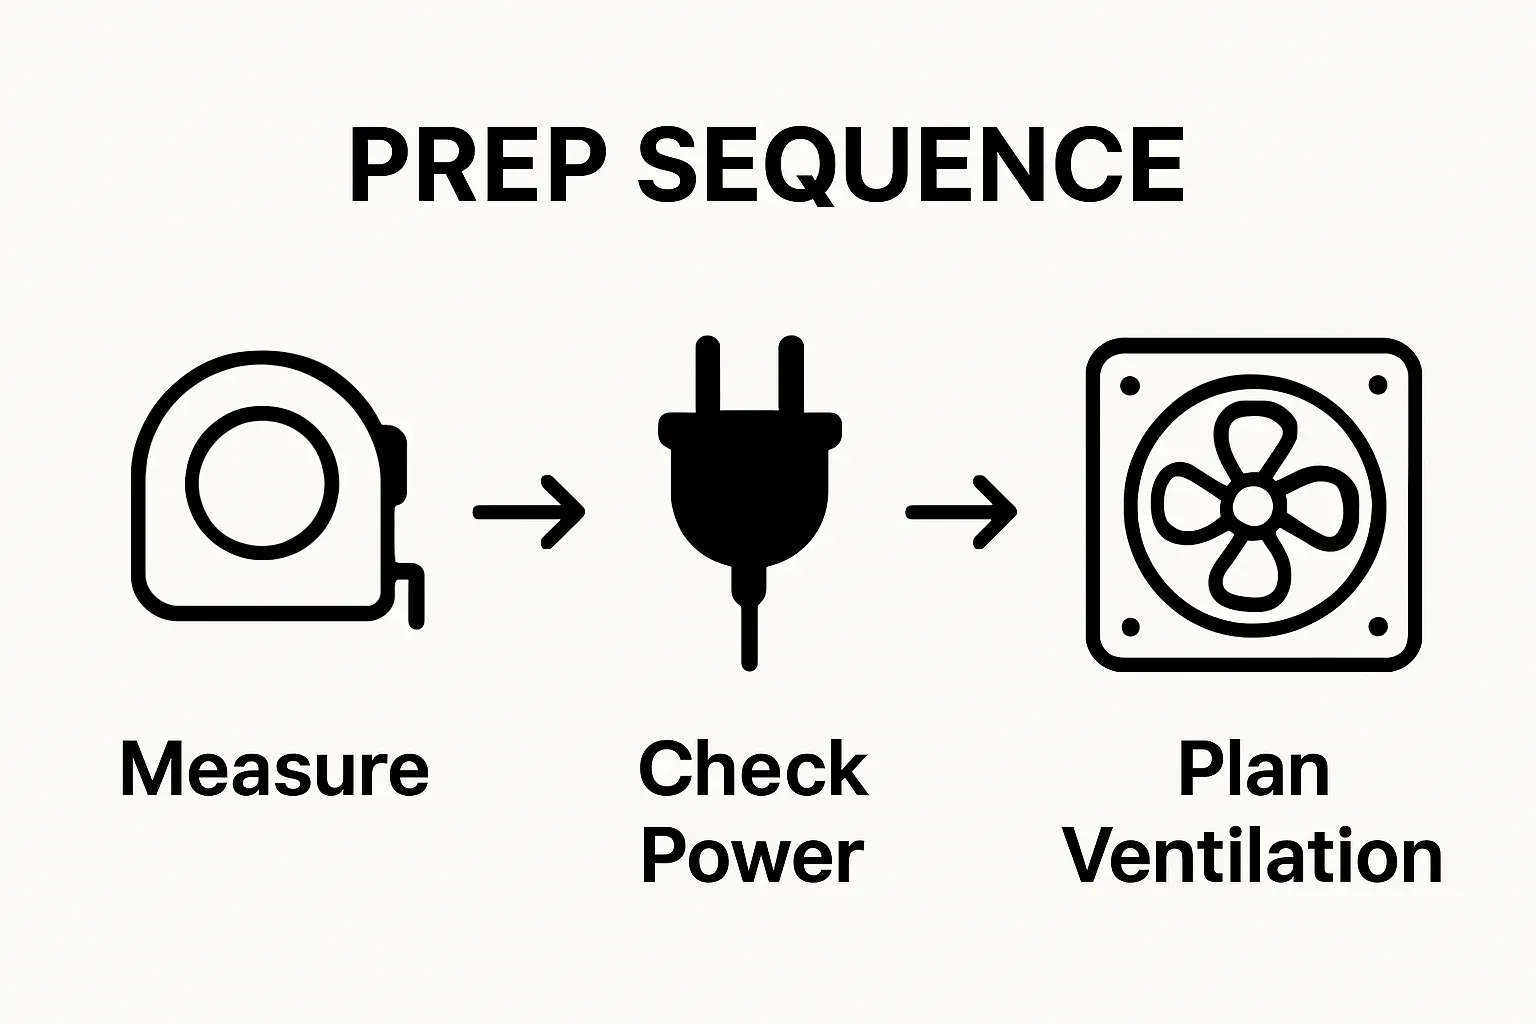
- Step 1: Assess Your Space For Sauna Installation
- Step 2: Select The Ideal Sauna Type For Your Needs
- Step 3: Prepare The Area For Sauna Setup
- Step 4: Install Sauna Equipment And Accessories
- Step 5: Optimize Environment Settings For Comfort
- Step 6: Verify Functionality And Enjoy Your Sauna
Quick Summary
| Key Point | Explanation |
|---|---|
| 1. Assess space carefully for sauna | Measure square footage and ensure proper clearance around the sauna for ventilation and accessibility. |
| 2. Choose the right sauna type | Decide between traditional and infrared based on health goals, space, and personal comfort preferences. |
| 3. Prepare flooring and environment | Use moisture-resistant surfaces and install barriers to protect against heat and humidity damage. |
| 4. Verify electrical requirements | Ensure dedicated circuits and safe electrical installations to prevent hazards during sauna use. |
| 5. Optimize temperature and ambiance | Calibrate temperature settings while adjusting lighting and ventilation for a personalized experience. |
Step 1: Assess Your Space for Sauna Installation
Successful sauna environment creation begins with a comprehensive space assessment. Your chosen location will dramatically impact the overall sauna experience, comfort, and functionality. Understanding the spatial requirements and potential challenges is crucial before investing time and resources into installation.
Carefully examining your available space involves more than just measuring square footage. Indoor and outdoor environments present unique considerations that can significantly influence your sauna’s performance and enjoyment. Consider areas like basements, spare rooms, patios, or dedicated wellness spaces that offer adequate room for your sauna setup.
Measurement precision is paramount. You’ll want to create a detailed floor plan that accounts for not just the sauna’s physical dimensions, but also necessary clearance around the unit. Typically, aim for at least 12 to 18 inches of open space on all sides of the sauna to ensure proper ventilation, accessibility, and safe heat dissipation. This buffer zone prevents potential heat damage to surrounding walls and allows comfortable movement during entry and exit.
Key spatial factors to evaluate include:
- Ceiling height (minimum 7 feet recommended)
- Electrical outlet proximity and voltage requirements
- Moisture resistance of surrounding surfaces
- Potential for proper ventilation
- Proximity to bathrooms or changing areas
Electrical infrastructure represents another critical assessment element. According to the Electrical Safety Foundation International, most residential saunas require dedicated 220-240 volt circuits with specific amperage ratings. Professional electricians can help verify your space meets these technical specifications, ensuring safe and efficient sauna operation.
When assessing potential locations, prioritize areas with stable, level flooring. Concrete, tile, or moisture-resistant wooden surfaces work best. Avoid carpeted spaces or areas with significant temperature fluctuations, as these can compromise sauna performance and longevity. Natural light and ventilation are bonus features, but not mandatory for an exceptional sauna environment.
By meticulously evaluating your space through this comprehensive lens, you’ll lay a solid foundation for creating a relaxing, functional sauna sanctuary that meets both practical and wellness objectives.
Step 2: Select the Ideal Sauna Type for Your Needs
Choosing the right sauna type transforms your wellness experience from ordinary to extraordinary. This critical decision goes beyond aesthetic preferences, demanding a strategic approach that aligns with your personal health goals, spatial constraints, and lifestyle requirements.
Traditional saunas and infrared models represent the two primary categories that merit careful consideration. Traditional saunas use heated air to warm your body, creating an intense heat environment where temperatures typically range between 150 to 195 degrees Fahrenheit. These saunas offer a classic experience with high humidity and robust heat that induces profound sweating and relaxation.
Infrared saunas, by contrast, operate through electromagnetic radiation that directly penetrates body tissues. According to the Mayo Clinic, these units generate lower ambient temperatures around 120 to 140 degrees while providing deeper tissue warming. This approach can be particularly beneficial for individuals seeking gentler heat exposure or those with specific therapeutic objectives.
Your personal health profile plays a significant role in sauna selection. Consider factors like:
- Cardiovascular health status
- Heat tolerance levels
- Specific wellness objectives
- Physical comfort preferences
- Budget constraints
When evaluating sauna types, examine materials and construction quality. Wooden saunas crafted from cedar or hemlock offer natural antimicrobial properties and superior heat retention. Modern portable infrared units provide flexibility for smaller spaces, while built-in traditional saunas deliver a more immersive experience.
Electrical requirements represent another crucial selection criterion. Traditional saunas demand higher voltage configurations, typically requiring 240-volt circuits. Infrared models often operate on standard 120-volt household electricity, presenting a more accessible installation option for many homeowners.
Beyond technical specifications, reflect on your intended usage frequency and primary wellness goals. Athletes might prioritize muscle recovery features, while stress management seekers could prefer gentler infrared environments. Some individuals even opt for hybrid models that combine traditional and infrared technologies, offering versatile therapeutic experiences.
Ultimately, the ideal sauna type emerges from a holistic assessment of your unique needs, spatial constraints, and wellness aspirations. Thoughtful selection ensures your sauna becomes not just an appliance, but a transformative wellness sanctuary tailored precisely to your lifestyle.
Below is a comparison table to help you evaluate the two main sauna types—traditional and infrared—based on key features and considerations mentioned in this guide.
| Sauna Type | Typical Temperature | Heating Method | Humidity Level | Electrical Requirement | Ideal For |
|---|---|---|---|---|---|
| Traditional | 150-195°F | Heated air/wood stove | High (can add steam) | 220-240V dedicated circuit | Classic sauna experience |
| Infrared | 120-140°F | Electromagnetic radiation | Low (dry heat) | Often 120V household outlet | Gentle therapeutic heat/existing spaces |
Step 3: Prepare the Area for Sauna Setup
Preparing your designated space for sauna installation represents a critical phase that determines the long-term performance and safety of your wellness sanctuary. Thorough preparation goes far beyond simple cleaning, requiring meticulous attention to structural integrity, environmental conditions, and potential modification needs.
Flooring represents the foundation of your sauna environment, demanding careful evaluation and potential reinforcement. Ideal surfaces include concrete, ceramic tiles, or moisture-resistant vinyl that can withstand high temperatures and potential condensation. Wood floors require additional protective measures, such as waterproof membrane installation and specialized heat-resistant underlayment to prevent moisture damage and structural compromise.
According to the National Wood Flooring Association, proper subfloor preparation is essential for preventing long-term damage. This involves checking for level surfaces, addressing any structural irregularities, and ensuring adequate support for the sauna’s weight. Professional-grade moisture barriers become critical, especially in basement or ground-level installations where potential humidity issues can create significant challenges.
Key preparation elements include:
- Comprehensive surface leveling
- Moisture barrier installation
- Electrical circuit verification
- Ventilation pathway assessment
- Thermal insulation evaluation
Electrical infrastructure demands rigorous pre-installation scrutiny. Most saunas require dedicated circuits with specific voltage and amperage ratings. This typically necessitates consultation with a licensed electrician who can verify your space meets technical specifications. Proper grounding, circuit capacity, and proximity to dedicated outlets represent critical considerations that cannot be overlooked.
Ventilation emerges as another crucial preparation factor. Your sauna area needs adequate air circulation to manage humidity, prevent moisture buildup, and ensure comfortable environmental conditions. This might involve installing exhaust fans, creating strategic wall vents, or modifying existing HVAC configurations. Proper ventilation protects not just the sauna equipment but also surrounding walls and flooring from potential moisture-related deterioration.
Consider potential aesthetic and functional modifications that might enhance your sauna environment. This could involve adding waterproof wall treatments, installing dimmer lighting for ambiance, or creating convenient storage solutions for towels and personal items. Strategic planning during the preparation phase prevents costly retrofitting and ensures a seamless, enjoyable sauna experience.
By approaching area preparation with comprehensive attention to detail, you create a robust foundation that supports optimal sauna performance, safety, and long-term enjoyment. Each preparatory step transforms your space from a mere room into a dedicated wellness sanctuary.
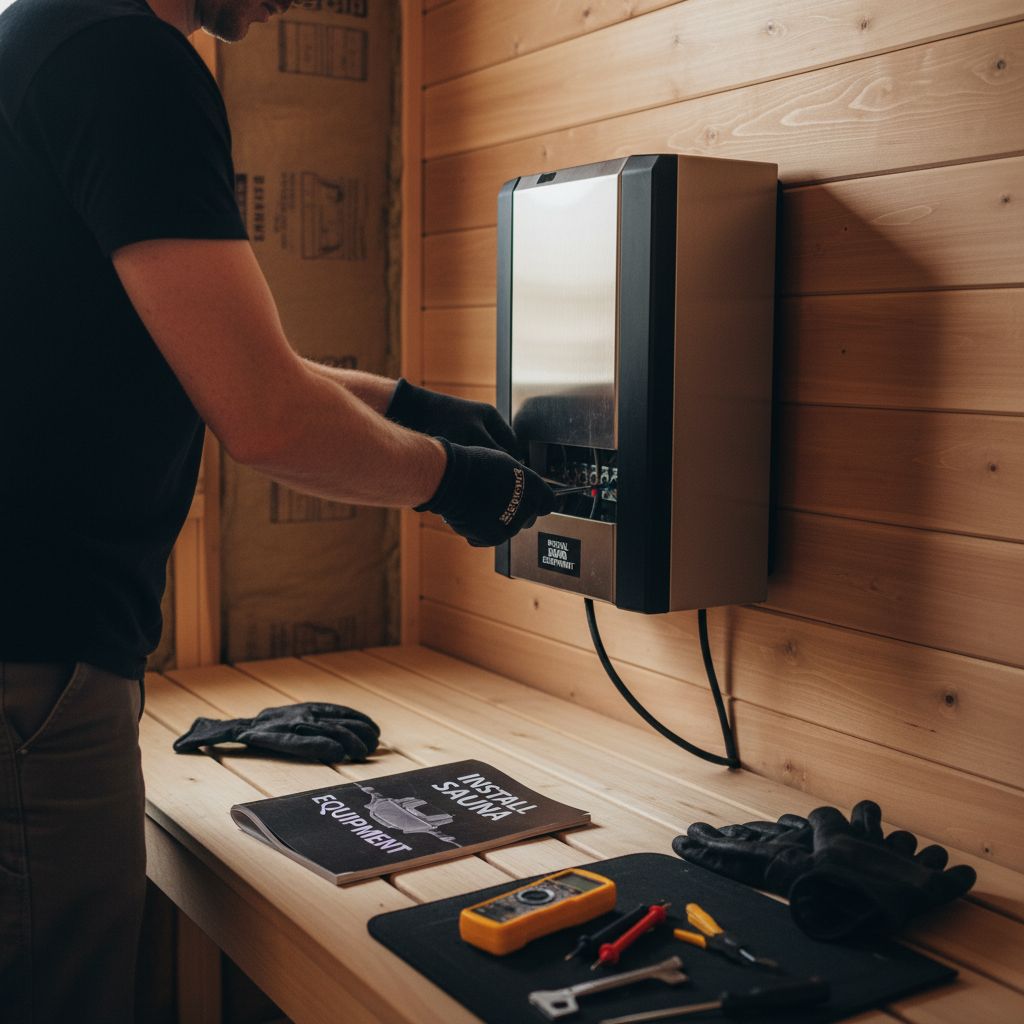
Step 4: Install Sauna Equipment and Accessories
Equipment installation represents the transformative moment where your sauna vision transitions from conceptual planning to tangible reality. This intricate process demands precision, patience, and a systematic approach that ensures both functional performance and aesthetic harmony.
Electrical components form the critical foundation of sauna installation. Begin by confirming that your dedicated electrical circuit matches manufacturer specifications. Professional electricians recommend using high-quality, heat-resistant wiring designed specifically for high-temperature environments. Secure connections and proper grounding are non-negotiable safety requirements that protect both your equipment and personal wellness.
According to the Occupational Safety and Health Administration, electrical installations in high-heat environments require meticulous attention to safety protocols. Verify that all electrical connections are sealed, protected from moisture, and positioned away from direct heat sources to prevent potential degradation or electrical hazards.
Key installation considerations include:
- Precise heater positioning
- Secure electrical connection verification
- Proper ventilation pathway establishment
- Accurate temperature sensor placement
- Structural stabilization techniques
Heater placement represents a nuanced aspect of sauna equipment installation. Traditional and infrared saunas have distinct mounting requirements that influence heat distribution and overall user experience. Infrared panels demand strategic positioning to maximize therapeutic heat penetration, typically mounted on walls or ceiling surfaces to create uniform thermal coverage.
Accessory integration elevates your sauna from functional to exceptional. Consider incorporating elements like chromotherapy lighting, integrated sound systems, or temperature control panels that enhance the overall wellness experience. Wireless control options provide convenient customization, allowing users to adjust environmental settings without disrupting relaxation.
Wood treatment and sealing become crucial during installation. Apply high-temperature wood sealants that protect against moisture and heat damage while preserving the natural beauty of sauna construction materials. Pay special attention to joint connections, ensuring tight seals that prevent heat leakage and maintain optimal thermal efficiency.
Verification represents the final critical stage of installation. Conduct a comprehensive system test, checking electrical connections, temperature responsiveness, and overall structural integrity. Run a complete heating cycle, monitoring performance and identifying any potential calibration needs. This methodical approach guarantees a safe, reliable, and supremely enjoyable sauna environment tailored precisely to your wellness objectives.
Step 5: Optimize Environment Settings for Comfort
Environmental optimization transforms your sauna from a basic heat chamber into a personalized wellness sanctuary. This nuanced process involves fine-tuning multiple parameters to create an immersive, therapeutic experience that caters to individual physiological and psychological needs.
Temperature calibration serves as the foundational element of sauna environment creation. Different sauna types demand unique approaches to heat management. Traditional saunas typically operate between 150 to 195 degrees Fahrenheit, while infrared units function more effectively at lower temperatures around 120 to 140 degrees. Begin by understanding your specific sauna’s recommended temperature range and gradually experiment to find your personal comfort zone.
According to the International Journal of Environmental Research and Public Health, precise temperature control significantly impacts physiological responses and overall wellness benefits. Start with moderate settings and incrementally adjust, paying close attention to your body’s reactions and comfort levels.
Key environmental optimization elements include:
- Humidity level management
- Lighting configuration
- Sound and acoustics
- Ventilation control
- Thermal gradient adjustment
Humidity represents a critical yet often overlooked aspect of sauna environment creation. Traditional saunas benefit from controlled moisture through occasional water application to hot stones, creating steam that enhances heat penetration. Infrared saunas, by contrast, maintain lower humidity levels, focusing on direct tissue warming. Invest in a reliable hygrometer to monitor and maintain optimal moisture balance.
Lighting and sensory elements play a profound role in creating a holistic wellness experience. Soft, adjustable lighting with warm color temperatures can promote relaxation and reduce stress. Consider integrating chromotherapy options that allow color-based mood enhancement. Dimmable LED systems provide versatility, enabling you to customize the ambiance according to your emotional and physical state.
Acoustic considerations extend beyond mere background noise. Some individuals prefer complete silence, while others find gentle soundscapes or meditative music enhancing their sauna experience. Waterproof bluetooth speakers or built-in sound systems offer flexible audio integration without compromising the sauna’s thermal integrity.
Ventilation optimization ensures a safe, comfortable environment. Proper air circulation prevents excessive humidity buildup and maintains a consistent thermal experience. Many modern saunas feature intelligent ventilation systems that automatically regulate airflow, creating a balanced microclimate that supports prolonged, comfortable sessions.
Ultimately, environment optimization is a personal journey of discovery. Approach it with patience, attentiveness, and a willingness to make incremental adjustments. Your ideal sauna setting emerges through thoughtful experimentation and mindful self-observation.
Step 6: Verify Functionality and Enjoy Your Sauna
Reaching the final stage of sauna environment creation marks an exciting moment of transformation where meticulous preparation converges with personal wellness potential. Functionality verification represents more than a technical checklist it becomes your gateway to a transformative health experience.
Initial operational testing requires a systematic and patient approach. Begin with a comprehensive system check, running your sauna through a complete heating cycle while monitoring temperature stability, electrical performance, and overall structural integrity. Listen carefully for any unusual sounds, observe heat distribution patterns, and ensure all control mechanisms respond precisely as expected.
According to the Centers for Disease Control and Prevention, equipment safety verification is paramount in high-temperature environments. Pay special attention to electrical connections, ensuring no exposed wiring or potential heat-related vulnerabilities exist.
Key verification elements include:
- Temperature accuracy verification
- Electrical system stability assessment
- Structural integrity confirmation
- Control panel functionality testing
- Safety feature examination
Thermal performance represents a critical aspect of functionality assessment. Use a reliable digital thermometer to cross-reference the sauna’s internal temperature readings with actual ambient conditions. Infrared and traditional saunas exhibit different heat distribution characteristics, so understanding these nuanced variations becomes essential for optimal usage.
Personal comfort calibration follows technical verification. Spend initial sessions gradually acclimating to your sauna’s unique thermal environment. Start with shorter 10-15 minute sessions, progressively increasing duration as your body adapts. Hydration becomes crucial hydrate generously before, during, and after sauna use to support your body’s natural thermoregulation processes.
Maintain a detailed log documenting your initial sauna experiences. Record temperature settings, session durations, and personal physical responses. This documentation helps you refine your approach, identifying optimal conditions that align with your wellness objectives. Consider tracking metrics like perceived relaxation levels, muscle tension reduction, and overall physiological comfort.
Beyond technical verification, embrace the holistic wellness journey your sauna represents. Create personalized rituals that transform each session into a meditative, rejuvenating experience. Experiment with aromatherapy, gentle stretching, or mindfulness practices that complement the sauna’s therapeutic heat environment.
By approaching functionality verification with mindfulness and precision, you transition from a mere sauna owner to a conscious wellness practitioner, ready to unlock the profound health benefits of your meticulously crafted personal sanctuary.
The following checklist table provides a clear overview of key verification steps to follow before enjoying your new sauna, ensuring both safety and optimal performance.
| Verification Step | What to Check | Why It Matters |
|---|---|---|
| Temperature Accuracy | Compare digital and built-in readings | Ensures proper, safe operation |
| Electrical System Stability | Inspect wiring and connections | Prevents electrical hazards |
| Structural Integrity | Examine frame and seating | Confirms safety and longevity |
| Control Panel Functionality | Test all controls and displays | Guarantees user-friendly setup |
| Safety Feature Examination | Check emergency shut-off, timers | Maximizes protection during use |
Transform Your Sauna Environment with Best Life Sauna Solutions
Achieving the perfect sauna sanctuary is more than measurement and installation. You want to avoid costly mistakes and ensure every detail works in harmony for ultimate relaxation. Whether you are struggling with space assessment, choosing between traditional and infrared options, or optimizing for comfort, finding high-quality products and expert support can make all the difference. Best Life Sauna takes the guesswork out of your wellness journey. Our curated selection of premium saunas and accessories, including infrared and traditional models, is designed to help you master every step outlined in your sauna environment creation quest.
Ready to experience the deepest relaxation and lasting health benefits? Get started today at Best Life Sauna. Enjoy exclusive offers like free shipping on orders over $200 and a price match guarantee. Make your dream wellness space a reality. Shop now and elevate your sauna journey with confidence.
Frequently Asked Questions
What elements should I assess for sauna installation?
Careful assessment includes measuring ceiling height, determining proximity to electrical outlets, evaluating moisture resistance of surrounding surfaces, ensuring proper ventilation, and considering the stability of the flooring.
What are the differences between traditional and infrared saunas?
Traditional saunas heat the air to high temperatures (150 to 195 degrees Fahrenheit) creating a humid environment, while infrared saunas use electromagnetic radiation to directly warm body tissues at lower temperatures (120 to 140 degrees Fahrenheit).
How do I prepare the area for sauna installation?
Preparation involves checking flooring for stability, installing moisture barriers, verifying electrical circuits, assessing ventilation pathways, and considering thermal insulation to ensure a safe and functional sauna environment.
What are key factors for optimizing the environment within a sauna?
Key factors include calibrating temperature and humidity levels, configuring lighting, managing sound and acoustics, optimizing ventilation, and adjusting thermal gradients to enhance relaxation and user comfort.