
How to Install a Sauna: A Step-by-Step Guide
Building a sauna at home sounds relaxing, and it actually has some real benefits you might not expect. For one, most home saunas need a dedicated 220-240 volt circuit, which surprises a lot of DIY enthusiasts who are used to simpler projects. But picking the right sauna and understanding just how much space and infrastructure you actually need is where most first-timers go wrong—sometimes it is the planning steps before you lift a hammer that make all the difference between endless frustration and having your own private wellness sanctuary.
Table of Contents
- Step 1: Assess Your Space And Select Sauna Type
- Step 2: Gather Required Tools And Materials
- Step 3: Prepare The Installation Area
- Step 4: Assemble The Sauna Components
- Step 5: Install Electrical And Ventilation Systems
- Step 6: Test And Verify Sauna Functionality
Quick Summary
| Key Point | Explanation |
|---|---|
| 1. Assess your space carefully | Measure ceiling height, floor dimensions, and room dynamics to ensure a suitable sauna installation. |
| 2. Choose the right sauna type | Select from traditional Finnish, infrared, or modular units based on installation complexity and available space. |
| 3. Gather appropriate tools and materials | Collect specific construction materials and necessary tools to streamline the sauna installation process. |
| 4. Ensure proper electrical setup | Work with a licensed electrician for safe installation of a dedicated electrical circuit, following all local regulations. |
| 5. Test sauna functionality thoroughly | Conduct checks on electrical, thermal, and structural components to ensure safe and efficient operation before use. |
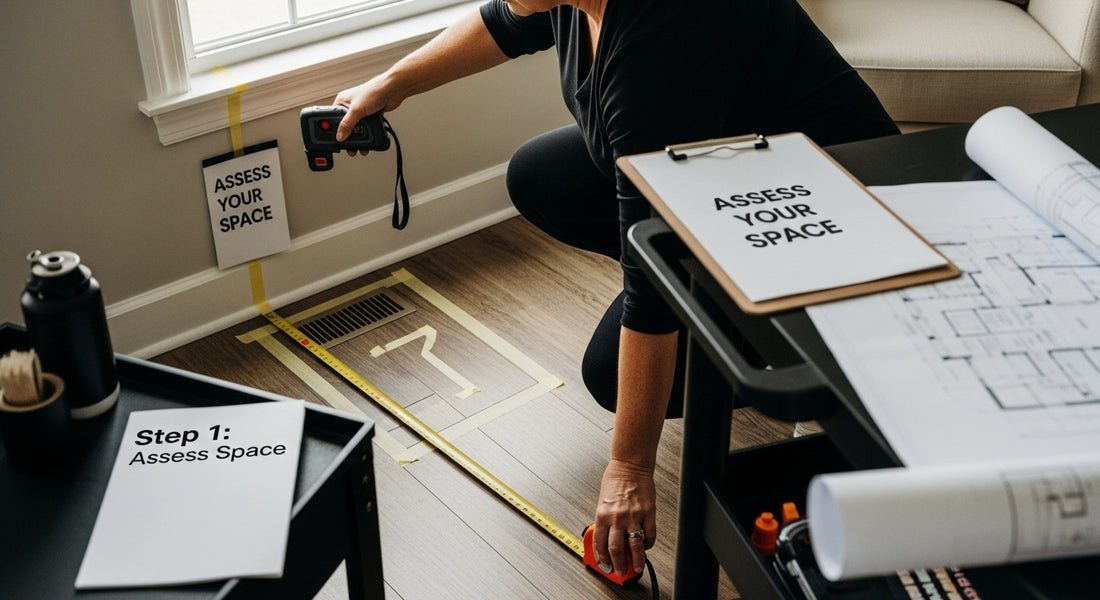
Step 1: Assess Your Space and Select Sauna Type
Before diving into sauna installation, understanding your available space and selecting the right sauna type is crucial for a successful project. Space assessment is the foundation of a comfortable and functional home sauna experience.
Carefully measure the area where you plan to install your sauna, considering not just floor space but also ceiling height and surrounding room dynamics. The North American Sauna Society recommends evaluating locations that offer privacy, adequate ventilation, and proximity to a bathroom or shower for post-sauna cooling.
Home sauna installations typically come in three primary configurations: traditional Finnish saunas, infrared saunas, and pre-fabricated modular units. Traditional saunas require more complex construction and dedicated electrical work, while infrared models offer easier installation with less structural modification. Modular units provide a middle ground, offering pre-engineered solutions that can be assembled relatively quickly.
Your room selection matters significantly. Ideal locations include basement areas, spare bathrooms, dedicated wellness spaces, or even spacious walk-in closets. Ensure the chosen area can support the sauna’s weight, has proper electrical infrastructure, and maintains stable temperature and humidity levels.
Key considerations for space selection include:
- Minimum clearance of 7 feet ceiling height
- Proximity to electrical outlets
- Moisture-resistant flooring
- Adequate ventilation options
- Minimal exposure to direct sunlight
Before purchasing, measure your intended space precisely. Most home saunas range from 4x4 feet for compact single-user models to 8x8 feet for larger, multi-person installations. Factor in additional space around the sauna for comfortable entry, exit, and potential changing areas.
By meticulously assessing your space and understanding available sauna types, you’ll set the stage for a successful installation that enhances your home wellness environment. The right preparation transforms sauna installation from a complex project to an achievable home improvement goal.
Step 2: Gather Required Tools and Materials
Successful sauna installation hinges on meticulous preparation and selecting the right tools and materials. Proper equipment gathering eliminates potential roadblocks and ensures a smooth construction process.
Start by creating a comprehensive inventory of materials specific to your chosen sauna type. For traditional saunas, you will need high-quality, moisture-resistant wood like cedar or hemlock, which offers natural resistance to humidity and provides excellent thermal properties. The Health & Fitness Association recommends using specialized construction materials that can withstand high temperatures and constant moisture exposure.
Your tool collection should include precision measuring instruments, power tools, and specialized woodworking equipment. Essential tools encompass a circular saw, drill, level, measuring tape, electric screwdriver, hammer, and safety gear like work gloves and protective eyewear. Remember that investing in quality tools upfront saves time and prevents potential installation complications.
Key materials for your sauna project will vary depending on your specific design but generally include:
- Framing lumber
- Tongue-and-groove wall paneling
- Insulation materials
- Vapor barrier
- Sauna heater
- Electrical components
- Ventilation materials
- Bench construction lumber
Electrical requirements demand careful consideration. Most home saunas require a dedicated 220-240 volt circuit, so consult with a licensed electrician to ensure proper wiring and safety compliance. Specialized sauna electrical components like temperature controllers, heating elements, and circuit breakers are critical for safe and efficient operation.
Beyond physical materials, gather comprehensive documentation including installation manuals, local building codes, and electrical permit requirements. Detailed preparation transforms a potentially complex project into a manageable home improvement task. By assembling your tools and materials methodically, you create a solid foundation for a successful sauna installation that will provide years of wellness and relaxation.
The table below summarizes the essential tools and materials required for sauna installation, along with their specific purposes to help you prepare for a seamless home sauna project.
| Tool/Material | Specification/Type | Purpose |
|---|---|---|
| Cedar or Hemlock Wood | Moisture-resistant, rot-resistant | Sauna walls, benches, interior finishes |
| Framing Lumber | Standard structural lumber | Base frame and support structure |
| Tongue-and-Groove Paneling | High-quality wood panels | Walls and ceiling for tight heat seal |
| Insulation Materials | Heat-resistant, suitable for saunas | Thermal efficiency and heat retention |
| Vapor Barrier | Waterproof membrane | Protects structure from moisture |
| Sauna Heater | Electric (220-240V) or other type | Produces necessary heat for sauna |
| Electric Drill/Screwdriver | With appropriate bits | Assembly of frame and paneling |
| Circular Saw | Power tool with wood blade | Cutting wood and structural components |
| Safety Gear | Gloves, protective eyewear | Ensures safe installation process |

Step 3: Prepare the Installation Area
Preparing the installation area represents a critical phase in your sauna project, where careful planning transforms your vision into a functional wellness space. Proper area preparation ensures structural integrity, safety, and optimal sauna performance.
Begin by completely clearing the designated space, removing any existing flooring, baseboards, or obstacles that might interfere with sauna construction. You will want a clean, level surface that can support the substantial weight of your sauna structure. The North American Sauna Society recommends consulting professionals during this initial design phase to maximize usability and comfort.
Floor preparation demands special attention. Ideal surfaces include concrete, tile, or moisture-resistant vinyl that can withstand high humidity and temperature fluctuations. If installing on wooden subfloors, reinforce the area with additional support beams and consider installing a waterproof membrane to protect against moisture damage. Ensure the floor can support approximately 50-75 pounds per square foot, accounting for the sauna’s weight plus occupants.
Electrical and ventilation considerations are paramount during area preparation. Locate and mark precise locations for electrical connections, ensuring proximity to dedicated circuit breakers. Plan your ventilation strategy carefully, as proper air circulation prevents moisture buildup and maintains a comfortable sauna environment.
Key preparation checkpoints include:
- Verify floor is level within 1/4 inch across entire surface
- Confirm electrical outlet placement
- Assess room humidity and potential moisture issues
- Check ceiling height meets minimum requirements
- Ensure adequate clearance around sauna perimeter
Moisture management represents another crucial aspect of area preparation. Install a waterproof barrier beneath and around the sauna area to prevent potential water damage. Consider adding a small floor drain or using waterproof mats to capture excess moisture and protect surrounding surfaces.
By methodically preparing your installation area, you create a solid foundation for a safe, enjoyable, and long-lasting home sauna experience. Attention to detail during this stage prevents potential complications and ensures a smooth installation process.
Step 4: Assemble the Sauna Components
Assembling sauna components requires precision, patience, and a systematic approach. The assembly phase transforms your carefully prepared space into a functional wellness sanctuary. Begin by thoroughly reviewing the manufacturer’s installation manual, as each sauna model has unique assembly requirements and specific structural nuances.
Start with the foundational framework, carefully positioning wall panels to create a solid, moisture-resistant enclosure. Tongue-and-groove paneling provides the most reliable seal, ensuring proper heat retention and structural integrity. When connecting panels, use stainless steel screws designed to withstand high temperatures and resist corrosion. Maintain consistent spacing and alignment, checking level and plumb measurements frequently to prevent future structural issues.
Heater installation demands meticulous attention. Position the sauna heater according to manufacturer specifications, typically 4-6 inches away from wall surfaces and with adequate clearance for ventilation. Electrical connections should be performed by a licensed electrician to ensure safety and compliance with local building codes. Most home saunas require a dedicated 220-240 volt circuit with proper grounding.
Bench construction represents another critical assembly component. Traditional sauna design typically incorporates two-tier bench arrangements, allowing users to experience different heat levels. Use rot-resistant woods like cedar or hemlock, ensuring benches are securely anchored to wall framing. Pay close attention to bench height and depth, creating comfortable seating that accommodates various body types.
Key assembly checkpoints include:
- Verify panel alignment and tight seals
- Check heater mounting and electrical connections
- Confirm bench stability and secure mounting
- Test door functionality and seal
- Inspect overall structural integrity
Ventilation components require careful placement to manage humidity and temperature effectively. Install inlet and outlet vents strategically, typically positioning the lower vent near the heater and the upper vent opposite the door. This configuration promotes optimal air circulation and prevents excessive heat buildup.
By methodically assembling sauna components with attention to detail, you create a safe, efficient, and enjoyable home wellness space.
Each carefully placed panel and precisely mounted component brings you closer to experiencing the transformative benefits of your personal sauna retreat.

Step 5: Install Electrical and Ventilation Systems
Installing electrical and ventilation systems represents the critical infrastructure phase of your sauna project, where safety and functionality converge. Proper electrical and ventilation setup ensures a comfortable, secure sauna experience that meets professional standards.
The International Association of Certified Home Inspectors emphasizes the paramount importance of precise electrical and ventilation configurations. Begin by establishing a dedicated electrical circuit specifically designed for your sauna heater. This typically requires a 220-240 volt line with appropriate amperage, installed by a licensed electrician who can guarantee compliance with local building codes and safety regulations.
Electrical installation demands meticulous attention to moisture-resistant components. Use high-temperature wire rated for sauna environments, ensuring all connections are protected from potential steam and humidity. Install a dedicated circuit breaker with ground fault circuit interrupter (GFCI) protection to prevent electrical hazards. Position electrical components strategically, keeping them away from direct water exposure while maintaining accessible maintenance points.
Ventilation systems play an equally crucial role in sauna functionality. Proper air circulation prevents moisture buildup, regulates internal temperature, and ensures a comfortable user experience. Install two primary vents: one near the heater’s base to allow fresh air intake, and another positioned high on the opposite wall to facilitate hot air extraction. This configuration creates natural convection, helping maintain optimal temperature and humidity levels.
Key installation considerations include:
- Use moisture-resistant electrical components
- Ensure dedicated circuit with proper amperage
- Position vents for maximum air circulation
- Install GFCI protection
- Maintain manufacturer-recommended clearances
Carefully seal all electrical conduits and vent openings to prevent heat loss and maintain the sauna’s thermal efficiency. Use high-temperature silicone caulking around electrical boxes and vent frames, creating an airtight seal that preserves the sauna’s internal environment.
By methodically installing electrical and ventilation systems, you transform your sauna from a simple wooden structure into a sophisticated wellness sanctuary. Each carefully placed wire and strategically positioned vent contributes to a safe, enjoyable, and professionally constructed home sauna experience.
Step 6: Test and Verify Sauna Functionality
Testing and verifying your sauna’s functionality represents the critical final phase of installation, where careful preparation meets real-world performance. This comprehensive evaluation ensures your wellness investment operates safely, efficiently, and precisely as designed.
InterNACHI recommends a systematic approach to sauna functionality testing that encompasses electrical, thermal, and structural components. Begin by conducting a thorough electrical system check, using a multimeter to verify proper voltage and circuit integrity. Activate the heater and monitor its performance, paying close attention to temperature ramp-up time, consistency, and overall heating efficiency.
Temperature and humidity control form the core of sauna performance. Use a reliable digital thermometer and hygrometer to track internal conditions during multiple heating cycles. Ideal sauna temperatures typically range between 150-195 degrees Fahrenheit, with humidity levels around 10-20%. Verify that your temperature controls operate smoothly, allowing precise adjustments without unexpected fluctuations.
Ventilation systems require meticulous testing to ensure proper air circulation. Open and close vents multiple times, checking for smooth operation and confirming they maintain a tight seal when closed. Listen for any unusual sounds that might indicate misalignment or potential mechanical issues. Assess airflow by releasing a small amount of smoke near vents and observing its movement, which should demonstrate consistent, predictable circulation patterns.
Key verification checkpoints include:
- Confirm heater reaches target temperature
- Test electrical connections for stability
- Verify ventilation system functionality
- Check door seal and operational smoothness
- Assess overall structural integrity
Structural integrity testing involves carefully examining all components for potential stress points or installation irregularities. Gently test bench stability, press against wall panels to check for secure mounting, and inspect all wood surfaces for potential warping or separation. Pay special attention to areas near electrical components and heat sources, ensuring no unexpected movements or gaps have developed during the initial operational phase.
This checklist table consolidates the key verification checkpoints for confirming your sauna is properly installed and fully functional before first use.
| Verification Item | What to Check or Do | Why It Matters |
|---|---|---|
| Heater Performance | Reaches and maintains target temperature | Ensures effective and safe heating |
| Electrical Connections | Stable, proper voltage, no exposed wires | Prevents hazards and ensures compliance |
| Ventilation System | Proper airflow through all vents | Maintains optimal humidity and airflow |
| Door Operation and Seal | Opens/closes smoothly, forms tight seal | Retains heat and ensures safety |
| Structural Integrity | Stable benches, wall panels secure | Supports user safety and long-term use |
| Wood Condition | No warping, cracks, or separation | Prevents future maintenance issues |
| Bench Stability | Securely mounted, supports weight | Ensures comfort and safety for users |
By methodically testing and verifying your sauna’s functionality, you transform your installation from a construction project into a reliable wellness sanctuary. Each careful check brings you closer to enjoying a safe, comfortable, and rejuvenating sauna experience tailored precisely to your home environment.
Make Sauna Installation Easier and Safer With the Right Solutions
Are you facing the challenge of planning your home sauna and feeling overwhelmed by all the decisions and technical steps, from measuring your space to selecting proper materials and ensuring safe electrical installation? Bringing the calming power of a sauna to your home should not be complicated or stressful. The right tools, premium materials, and expert guidance can turn a complex project into a rewarding investment in your well-being. Many people run into roadblocks like unclear instructions, sourcing sauna-grade materials, or uncertainty about the most efficient and safe setup. That is why choosing a trusted partner with comprehensive wellness solutions can make all the difference.

Discover how you can make your dream sauna a reality with Best Life Sauna, your destination for premium wellness products. Browse our variety of infrared saunas and traditional units, as well as all the essential sauna accessories you need for a safe and relaxing installation. Do not miss out on free shipping, a price match guarantee, and customer-first support designed for your peace of mind. Visit our main site at https://bestlifesauna.com and take the first step toward hassle-free wellness at home. Act now to benefit from our latest offers and ensure your sauna journey starts the right way.
Frequently Asked Questions
What types of saunas can I install at home?
Home saunas typically come in three configurations: traditional Finnish saunas, infrared saunas, and pre-fabricated modular units. Each has its unique installation requirements and benefits.
How do I prepare the installation area for a sauna?
Preparing the area involves clearing the space, ensuring a level and moisture-resistant floor, and planning for electrical and ventilation requirements. It’s also crucial to verify that the floor can support the sauna’s weight.
What safety considerations should I keep in mind during sauna installation?
When installing a sauna, ensure you have a dedicated electrical circuit installed by a licensed electrician, use moisture-resistant materials, and follow proper ventilation guidelines to prevent moisture buildup.
How can I test if my sauna is functioning properly after installation?
To test sauna functionality, check that the heater reaches and maintains the desired temperature, verify that electrical connections are stable, and assess the ventilation system’s effectiveness by observing air circulation patterns.